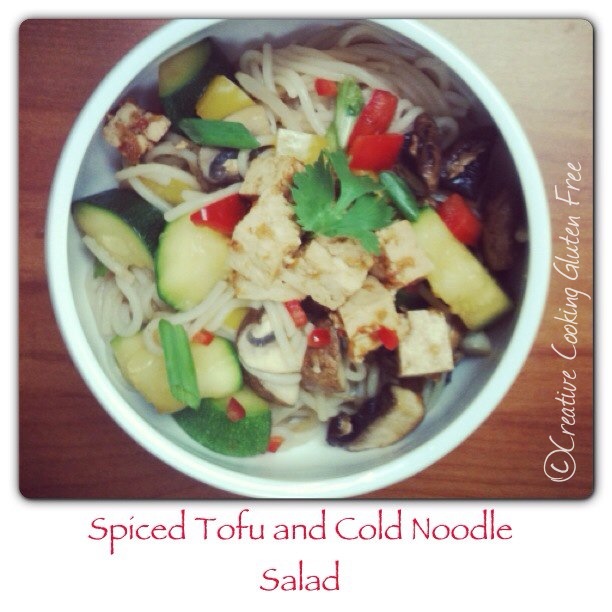
Spicy Tofu and Cold Noodle Salad

IMG_4495

I love soy products and sadly I don not consume enough of them, but that will be changing soon. I actually fell in love with soy milk when I lived in China.  I would wake up early to head down to the dining hall on the campus where I was working just so I could grab as many of the cups of fresh made soy milk that I could. I love both warm and chilled so I would drink one or two with my breakfast then put the rest in my refrigerator for later.

To me tofu is like risotto. By that I mean they are both blank canvases and you can do so much with them. Tofu is very versatile it can be used in smoothies, soups, desserts, stir-fries, fried, enjoyed as is, and so much more. It also takes on the flavor profile of whatever you marinade or cook it in. If you haven’t had a chance to try it, you really should. I feel like tofu gets a bad rap some times, people say they have had it and hate it but I wonder how they had it? Was it a not so good preparation or recipe? If so maybe this recipe will change your mind?

Here is a little information about Soybean and Soy Products

(information take from lecture notes, Vegetarian Cuisine lab at JWU with Chef Cwynar)

  • Soybeans are a wild plant from East Asia and have an edible seed.
  • The seed colors can vary from yellow, green, brow, black, or multicolored – here in the US we consume the green beans.
  • Soybeans are oilseeds – which are mainly grown for oil extraction.
  • Soybeans are great sources of protein and their composition is: 33% protein, 39% fat, and 28% carbohydrates. 1 cup cooked soybeans = 28 gm of protein (about 1 ounce)
  • Rich in omega-3 and omega-6 fatty acids
  • Great sources of protein for diabetics
  • Low in saturated fat
  • FDA recommended soy food intake: “25 grams of soy protein a day as part of a diet low in saturated fat and cholesterol may reduce the risk of heart disease”
  • Soy protein is one of the only plant proteins that is equivalent to animal protein.
  • Contains all 9 essential amino acids with high digestibility (.91)
  • Other benefits of soy: Reduces Cholesterol (could cut heart disease risk by 25-30%), Slows Artery-Clogging (neutralizes the ability of LDL cholesterol to infiltrate artery walls and trigger plague buildup which aids in avoid a heart attack), Fights Cancer (soy isoflavones – genistein, suppresses the growth of cancer cells), Strengthens Bones (new evidence that soy foods can cut the risk of osteoporosis and fractures in later years),  Eases Hot Flashes (because soy has estrogen like activity, a decrease of hot flashes may occur), and Helps Equalize Blood Sugar (for diabetics).
  • Isoflavones – studies show that as little as 25% grams of soy per day (less than 1 ounce!) reduces the risk of: heart disease, breast cancer, digestive disorders, eases symptoms of menopause, eliminates the problems of lactose intolerance, prevents symptoms of milk allergies, and is beneficial in diabetic diets (equalizes blood sugar)

Tips on ways to add soy products into your diet

  • Soymilk – don’t expect it to taste like cows milk, it has a nutty flavor, comes in many varieties such as: plain unsweetened, sweetened, vanilla, and chocolate
  • Tofu: use silken tofu in soups (miso soup), smoothies, and custard like desserts, it takes on different flavor profiles, if you marinate it before cooking it will have a deeper more intense flavor, you can grill it, bake it, fry it.

Last week was soy week in vegetarian cuisine and below is the recipe that I created.I like to make different noodle dishes at home, some warm, some cold, and I never write down how I make it because usually it is one of those “what do I have in the house” type meals. So when I knew that I had to make a salad for class that night I thought, “oh this is the perfect opportunity for me to actually write it down!”. I tend to change up the ingredients based on what I have on hand so feel free to get creative with this. Sometimes I drizzle in a little toasted sesame seed oil, and chili oil (we like spice in this house!), and even top with some toasted sesame seeds.

This salad works great for summer cookouts because there is no dairy. It travels well and the longer it sits the more intense the flavor. I would suggest eating it within a day or two though (if there is any left).

Spicy Tofu and Cold Noodle Salad

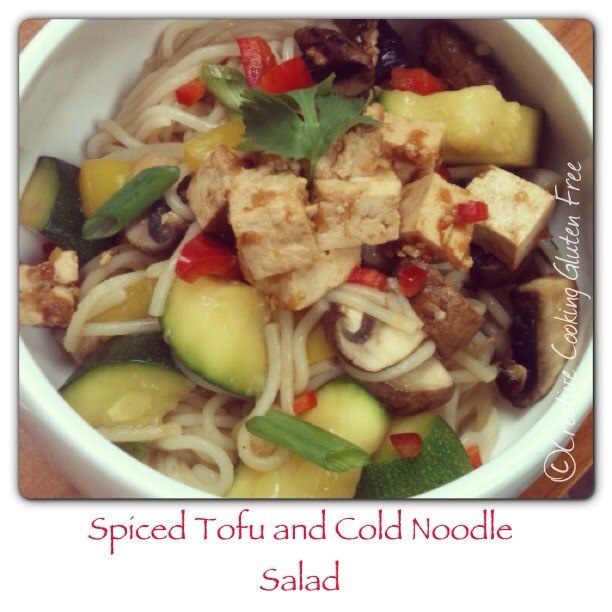
IMG_4496(close up)

Sauce/Marinade (divided)

  • Ginger, fresh, grated                                                                                       1 tsp.
  • Garlic, fresh, grated                                                                                        1 ½ tsp.
  • Tamari, gluten-free, low sodium                                                                      4 tbs.
  • Chili paste                                                                                                       1 tsp.
  • Hoisin Sauce, gluten-free                                                                                1 ¼ tsp.
  • Agave or honey                                                                                               ½ tsp.

Cold Noodle Salad

  • Tofu, extra firm, diced                                                                                      6 oz.
  • Mushrooms, baby portabella, diced                                                                10 oz.
  • Zucchini, diced                                                                                                10 oz.
  • Bell Pepper, red, diced                                                                                    4 oz.
  • Bell Pepper, yellow, diced                                                                               4 oz
  • Water, tap                                                                                                        1 qt
  • Rice noodles, Medium                                                                                     12 oz
  • Green onion, cut on a bias                                                                              ½ oz
  • Bean sprouts                                                                                                   4 oz
  • Cilantro, chopped (divided)                                                                             1 tbsp.

Method of Preparation

1.   Gather all the ingredients and equipment.

2.   Peel the ginger and garlic and grate them into a medium bowl using a microplane.

3.   Add remaining sauce/marinade ingredients (Tamari, chili paste, hoisin sauce, and agave), mix well.

4.   Check sauce/marinade for spice level and adjust if needed.

5.   Take 2 tablespoons of sauce/marinade and place in another medium bowl. This will be used to marinade the tofu.

6.   Gently wrap tofu in a several paper towels and press it lightly to remove any additional moisture.

11. After you have pressed the tofu, dice it into ½ inch chunks and add to the second bowl to marinade for 20 minutes.

12. Gently wipe the mushrooms clean with a damp paper towel to remove any dirt.

13. Cut the mushrooms into quarters and set aside.

14. Wash the zucchini and pat dry. Cut in half, length wise, then cut in half, length wise again. Dice into ½ inch pieces and set aside.

15. Wash peppers. Remove tops, seeds, and ribs. Dice into ½ inch pieces and set aside.

16. In a large sauce pan add 1 quart of water and bring to a boil.

17. Once the water is at a boil, add the rice noodles and cook for 7 minutes.

18. Add all mushrooms, zucchini, and red and yellow bell peppers to the boiling water. Continue to cook for an additional 3 minutes.

19. Strain all contents of the pot in to a chinois and run cold water over the noodles and vegetables to stop the cooking process. Drain well.

20. Add the noodles to the first bowl with the sauce/marinade and mix well to make sure all the noodles are coated with the sauce/marinade.

21. Add in the green onions, bean sprouts, and ¾ tablespoon cilantro, mix well.

22. Place the noodles and vegetables on a serving dish and top with marinated tofu and the remaining ¼ tablespoon of chopped cilantro.

Chefs Notes:

A)    The medium rice noodles work very well in this dish, they absorb the sauce nicely, however you may substitute thin or thick rice noodles, buckwheat noodles, or gluten-free spaghetti (Sam Mills corn pasta works great in this).

Spinach-Stuffed Flank Steak

Martha Stewart’s Spinach Stuffed Flank Steak

My Spinach-Stuffed Flank Steak (minus the red pepper sauce)

I have been wanting to make this recipe for a while, but wasn’t sure how Bryan would feel about it because it has a cheese that he isn’t very familiar with and it also has capers.  I offered to leave out the capers but he said he would try them.  I should have  listened to my instincts and left them out.  He tried one but he just wasn’t a fan, they were too salty for him.  I’m not one for very salty foods but I love these green little gems, probably because I love chicken piccata so much. As it turns out, Bryan really liked this recipe and said this is one we should make again.

The recipe is from Martha Stewart’s Everyday Food Magazine and it is also in her Everyday Food Cookbook “Fresh Flavor Fast” Another great recipe from here that is also naturally gluten-free!  You would be amazed how many of these recipes are naturally gluten-free or can very easily be adapted to gluten-free.

Seeing as this is a stuffed steak, it needed to be butterflied first, then stuffed with the spinach mixture and rolled up.  I always hear about people going to the grocery store and having the butcher cut their meat a certain way such as butterflied so I thought, why not give it a shot and have them do it.  I was so wrong, no pun intended here but he butchered my flank steak.  I was so upset when I got home and opened it up.  I should have taken a picture to show you all how bad it was.  It was completely uneven with some pieces being extremely thing and others looking like they hadn’t been cut.  I made the best of it for this because I didn’t want to waste the meat but not to self, next time do it myself!  However if you have a good butcher I’m sure he would do fine but this guy was complaining the whole time he was cutting this piece.  I am very much looking forward to my meat cutting class at school!

Here is how to butterfly the flank steak according to the recipe:

Butterflying the Steak: Lay the meat on a cutting board, with the grain of the steak running horizontally. Using a long sharp knife, cut the meat almost in half horizontally, opening it like a book but stopping before going all the way through.

With the steak being cut so uneven I had to adjust the cooking time a bit and despite having to put it in a few times because the middle just wasn’t cooked to our liking (it was pretty much raw – but again I blame that on the butcher and not the actual recipe its self.) it was a very tasty, easy and fairly quick dinner.  We served ours with mashed potatoes and steamed broccoli.

Too add a little something extra to it I made a Red Pepper Sauce to go on the side to either drizzle on top of the steak or just to dip it in.   I used a container of Wild Veggie Red Pepper Soup as the base, added a tablespoon of balsamic vinegar, 1 teaspoon of salt and 1/2 teaspoon fine ground pepper.  To thicken it up just a bit I added a small amount of cornstarch/water mixture.

Have you heard about Wild Veggie yet?  If not you should check out their website and products.  Here is a little blurb about them from their website:

What is Wild Veggie? Is it a soup? Is it a drink? Is it an ingredient? If you think it’s all of the above, then you’re right! Wild Veggie is good in everything… and is good for everybody. Compared to similar products on the market, Wild Veggie is low in sodium and calories, and typically has more vitamins and nutrients, not only meeting but exceeding daily recommendations in many cases.

We start with the absolute freshest vegetables we can find, always picked at their peak of ripeness and flavor. We then wash, micro-cut, and fast cook at a low temperature, and then quickly freeze to preserve as much of the natural vegetable flavor as possible. There are no preservatives. No fake chemicals. Just the wonderful taste of pure, fresh vegetables.

Our unique process preserves the natural integrity, flavor or nutrients of the vegetables — we do not compromise on flavor or freshness, meaning that Wild Veggie is good for every body.

Spinach Stuffed Flank Steak (Martha Stewart – Everyday Food Magazine)

  • 2 packages (10 ounces each) frozen leaf spinach, thawed

  • 1/4 cup fresh parsley, chopped

  • 1/4 cup grated Asiago cheese

  • 2 tablespoons capers, rinsed and drained

  • 2 tablespoons balsamic vinegar

  • 1 garlic clove, minced

  • 1/4 teaspoon red-pepper flakes

  • coarse salt and ground pepper

  • 1 small flank steak (1 pound)

  • 1 teaspoon olive oil

    1. Heat broiler, with rack set 4 inches from heat. Line a rimmed baking sheet with aluminum foil; set aside. Place spinach in a clean kitchen towel, and squeeze out as much liquid as possible.
    2. In a medium bowl, combine spinach, parsley, cheese, capers, vinegar, garlic, and red-pepper flakes. Season with salt and pepper; toss to combine. Cut and open steak.
    3. Cut several 12-inch pieces of kitchen twine; space evenly underneath steak. Spread spinach mixture down center of meat (see opposite). Roll steak over mixture, pressing firmly to compact the filling as much as possible; tie twine to secure roll. Cut roll in half crosswise. Place halves, seam side down, on prepared baking sheet; rub with oil, and season with salt and pepper.
    4. Broil until browned, 8 to 10 minutes for medium-rare; let rest, loosely covered with foil, 10 minutes. Remove string, and slice steak into 1/2-inch rounds.


    Butternut Squash Soup & Croutons

    I have been wanting to make some butternut squash soup for a while now, but sadly I don’t own a food processor, blender or immersion blender so I put it off. I started thinking about the soup again this past week and was determined to make it, so I thought if I cooked the squash enough I could just mash it, but then it wouldn’t have that smooth creamy texture so I finally went next door and asked my neighbor if she had a blender or food processor I could borrow.  Of course she had one, and why had I not thought of asking her sooner?  Who knows, I’m a bit slow lately.  Being sick for a month has really thrown me for a loop.  I am finally feeling better and getting back into cooking more.  Poor Bryan has been dealing with my half-ass attempts of meals lately, which consisted of mostly “mushy” foods because I couldn’t chew anything.  Even though this soup could be considered another “mushy” meal I refuse to look at it that way because I have been craving it for so long.  To add a little bit of texture to the soup I topped it with some crispy bacon pieces and homemade gluten-free croutons (see recipe below).

    Like always, I did some searching online for butternut squash soup recipes just to see what others put in theirs.  I found that many of the recipes were similar to the one that I had floating around in my head so I figured I would just wing it and see how it tasted (maybe not always the best idea). Bryan hasn’t really eaten butternut squash much and has never had butternut squash soup, so to make it more appealing to him I wanted to add a bit of spice to it.  The first time I ever had this soup was in China of all places.  It was amazing.   If you don’t like that much spice you can always start by cutting those ingredients in half at first, taste it and then add accordingly.

    Spiced Butternut Squash Soup

    2 tablespoons olive oil (or butter)

    4 celery stalks – diced

    3 garlic cloves, chopped

    2 medium-large butternut squash (about 3 – 3.5 pounds) – See prep options below

    1 large sweet potato (or two small/medium) Peeled and cut into 1 inch pieces

    3 cups of chicken broth (gluten-free low sodium/organic)

    1/4 teaspoon cayenne pepper

    1/8 teaspoon allspice

    1/8 teaspoon cinnamon

    1/4 teaspoon nutmeg

    1/4 teaspoon ground ginger

    salt and pepper to taste

    1/4-1/2 cup half and half

    There are two ways that you can prepare the squash:

    1- Cut the squash in half lengthwise, scoop out seeds and place flesh side down on a foil lined baking sheet (oiled/sprayed well).  In a pre-heated 400 degree oven for 40-50 minutes.  Once roasted and cooled slightly scoop out flesh and add to soup

    2- Peel the squash, cut in half lengthwise, scoop out seeds and then chop into one inch cubes.  Cook squash in the soup with out roasting.

    The first one is probably a bit easier because the skin of the squash is very touch and can be a pain to peel.  I have a really good peeler so I didn’t have any problems with it.  So it is completely up to you on which method you prefer to use, and you will get great results either way.  The recipe below is for option number two, however if you choose to roast your squash then scoop it out add it after you sauté the celery, garlic add the broth.  You can then go right into pureeing the soup.

    Directions:

    Peel and cut your squash and sweet potato and set aside.  Over medium heat in a large sauce pan (or stock pot) add olive oil and celery, cook for 3-4 minutes or until softened.  Add garlic and cook for an additional two minutes.  Next, add squash, sweet potato, half of the spices and chicken broth.  Bring to a boil for 20 minutes.  Lower heat to simmer.

    In small batches ladle the soup into a blender (or food processor) and puree until smooth and there are no chunks.  Add the pureed soup back into the pan and repeat until all the soup has been pureed and it is smooth.  Add remaining spices and half and half.  Do Not bring back to a boil, just simmer on low for 15-20 minutes.  Serve warm with your choice of toppings (bacon, croutons, sour cream, spiced pumpkin seeds etc.)

    We served ours with crumbled maple bacon bits and some gluten-free multigrain croutons. Croutons are so simple to make, I dont’ know why people buy them. You can make them how ever you wish, plain, garlic, seasoned etc. You should really try to experiment with them at some point.  Great in both soups and salads or to just munch on.

    Gluten-Free Croutons

    6 pieces of gluten-free bread (I used Rudi’s Multi Grain Bread)

    1 clove of garlic minced

    3 – 4 tablespoons olive oil

    1 tablespoon melted butter

    salt

    Pre-heat oven to 300 degrees. In a bowl combine garlic, oil, butter and salt – set aside.  Cut bread into small chunks and place them on a foil lined baking sheet.  Drizzle the oil, butter and garlic mixture over the bread chunks.  Toss the bread to make sure it is evenly coated.  Bake at 300 for 15-20 minutes, turning once.  Croutons should be a light/medium golden brown.

    You can all any seasoning you wish to your croutons and increase the measurements according to the amount of bread you are using.  Other seasoning options include: dried basil, dried oregano, celery seed, pepper, parsley, grated parmesan cheese or whatever you wish.

    These can be stored in an air tight container for up to four weeks or frozen for up to six months.

    Help Rudi’s “Spread The Bread” “For every dollar coupon downloaded, Rudi’s Gluten-Free Bakery will give a dollar to The National Foundation for Celiac Awareness (NFCA) to help in their efforts to better educate physicians in the diagnosis of celiac disease. There are an estimated 3 million people in the United States suffering from celiac disease, yet only 160,000 are diagnosed.” Get your coupon HERE!

    Roast Beef, Peppers and Potatoes

    If you have been following my blog you’ll notice my love for Martha Stewart’s magazine, Everyday Food.  It is by far my favorite magazine because the recipes are easy, not overly complicated, if they aren’t naturally gluten-free, they are easily adaptable and there are so many great tips in them.  My mom bought me a subscription when it was first published and over the years I have tried my best to keep up with it.  If you don’t have a subscription you can find all the recipes online, however I suggest getting one of the magazines and checking it out for yourself.

    Each time a new one comes in the mail I start flipping through it right away and marking all the recipes I want to try.  I don’t always make them right away but I eventually get around to trying my hand at them.  The recipe I made tonight comes from January/February 2007 Light edition.  The recipe was 100% gluten-free (even if it doesn’t say so in the magazine, just read the ingredients).  The only modification I made on this one was I omitted the onions.  Such a simple meal and all in one pan!  Quick, easy, great tasty and easy clean up! Bryan really liked this meal and said he wouldn’t mind having it again!

    Roast Beef, Peppers and Potatoes (Martha Stewart – Everyday Food Magazine, 2007)

    Serves 4

    • 3 red bell peppers (ribs and seeds removed), cut into 1-inch-wide strips – We had red so that is all we used
    • 2 yellow bell peppers (ribs and seeds removed), cut into 1-inch-wide strips – We had red so that is all we used
    • 2 medium red onions, halved and cut into 1-inch wedges – We omitted these
    • 3/4 pound white new potatoes, well scrubbed and cut into 1-inch chunks
    • 5 garlic cloves, peeled (3 left whole and 2 cut into 12 slivers)
    • 2 tablespoons olive oil
    • Coarse salt and ground pepper
    • 2 1/2 pounds eye-of-round beef roast
    • 3/4 teaspoon dried thyme

    Directions

    1. Preheat oven to 400 degrees. Place peppers, onions, potatoes, and whole garlic cloves on a large rimmed baking sheet. Drizzle with half the oil, season with salt and pepper, and toss to coat.
    2. Using a paring knife, make 12 small slits in top and sides of roast; push in garlic slivers. Move vegetables to sides of sheet. Place beef in center, and coat with remaining oil; rub all over with 1 1/2 teaspoons coarse salt, 1/2 teaspoon pepper, and thyme.
    3. Roast 40 to 50 minutes, tossing vegetables occasionally, until tender and an instant-read thermometer inserted into thickest part of beef registers 130 degrees for medium-rare. Let meat stand 10 minutes, loosely tented with aluminum foil to keep warm. Cut half into very thin slices (reserve remaining half for leftovers). Serve with vegetables.
    4. Cool remaining beef to room temperature; place in an airtight container, or wrap in plastic, and refrigerate.

    Read more at Marthastewart.com: Roast Beef with Peppers, Onions, and Potatoes – Martha Stewart Recipes


    P.F. Chang’s Beef a La Sichuan

    My version of P.F. Chang’s Beef a La Sichuan

    P.F. Chang’s Beef a La Sichuan

    Yesterday was day two in my weekly menu planning and Bryan’s last day of classes for his first semester as a 1L, so I decided to celebrate I would try to tackled one of our favorite P.F. Chang’s recipes – Beef a La Sichuan.  Ever since this was put on the gluten-free menu at P.F. Chang’s it is all Bryan will order.  I usually order the Chang’s Spicy Chicken (it’s amazing if you haven’t had it yet, you should).  Sadly though we don’t have a P.F. Chang’s close to us so I’ve been searching online for “copycat” recipes for this dish.  I really only found one, but found plenty of pictures of the dish which didn’t help me at all.  The recipe I found was pretty good, however it didn’t have any measurements for the ingredients! Seeing as we hadn’t had this in a while I had to think back to what it tasted like and try to build a sauce based on memory-honestly I got it on the first shot…not sure if I should be proud of that or kind of embarrassed.  If you don’t know Chinese food is my biggest weakness and seeing as I can’t go to any restaurant and get something I do my best to create recipes inspired by my favorite Chinese/Asian dishes.

    I found the recipe on RecipeLink.com and like I said it had no measurements so below is my measurements along with RecipeLink.com’s directions.  Now this recipe is a little in-depth with the preparation so be prepared to spend a bit of time in the kitchen the first time-but I promise it is worth it.  I’m sure you can always find some shortcuts, like finding celery and carrots that are already julienned for you but I wanted to do it start to finished myself.   The original recipe called for green onion stems but seeing as we don’t cook/consume onions in our house we just omitted them but you can add them in if you wish.

    P.F. Chang’s Beef a La Sichuan

    Stir Fry Ingredients:

    1 Pound Flank or Sirloin Steak Sliced thin
    3-4 Medium Celery Stalks -Julienned
    2 Medium Carrots – Julienned
    Green Onion Stems (Optional)
    1/2 Cup Peanut Oil or Canola Oil (you may use less if using a non-stick pan, I only use about 1/4 cup)
    1/4 Cup Corn Starch
    1/2 Teaspoon Red Pepper Flakes(or whole Tien Tsin Chinese Chili Peppers work great)

    1 1/2 Teaspoons Sesame Oil

    Sauce Ingredients:

    3 Tablespoons Gluten Free Soy Sauce (I use San-J)
    2 Tablespoons Gluten Free Hoisin Sauce (I use Dynasty)
    1 Tablespoon Garlic Chili Paste
    1/2 Teaspoon Chinese Hot Mustard
    1 Teaspoon Rice Wine Vinegar
    1/2 Teaspoon Chili oil/or Mongolian Fire Oil (made by House of Tsang) -(Optional)
    1 – 2 Teaspoons Brown Sugar
    1 Teaspoon Minced garlic
    1/2 Teaspoon Minced Ginger
    1/2 Teaspoon Red Pepper Flakes

    Directions

    Mix all of the sauce ingredients together and set aside.

    Julienne your carrots and celery and set aside. It is important to get these done first because when it comes time to stir-fry them, it is a very quick process.

    An important step is “velveting your beef” – Thinly slice your beef and place in a bowl. Add the cornstarch and  toss to make sure each piece is thoroughly coated. Set aside for 10 minutes.

    Rinse beef free from all cornstarch and pat dry – you do not want any moisture or the oil will splatter when you add the beef to the pan.

    In a skillet (or wok), fry the sliced meat in hot peanut (or canola) oil until crispy to your liking. Remove from oil, drain on paper towels.

    In the same pan (or wok) add the following ingredients in this order with sesame oil: stir-fry celery, crushed red pepper flakes (or Tein Tsin Chinese Chili Peppers) followed by carrots. Do not over cook these ingredients – you want them to be nice and crispy. Add fried meat and green onions. Add sauce and bring to a fast boil, cook for 1 minute and serve immediately over white or brown rice.

    This last step should take only 3-4 minutes – it is a very quick process so be sure to keep an eye on it so it doesn’t over cook.

    Notes:

    I sliced my beef a little bigger than P.F. Chang’s does but not by much and didn’t fry it as much as they do.  Some times the beef can become a bit tough when it is fried too long so I left mine a little tender but still had a slight crunch to it.

    The veggies were perfect – like the directions above say DO NOT OVER COOK them – they are supposed to be nice and crunchy.  This process goes very quickly.

    I drained off most of the remaining oil from frying the beef before adding the Sesame oil and veggies.  I didn’t wan it to be too oily.

    The recipe called for Chili Oil but I couldn’t find it anywhere around me (my grocery stores aren’t so good with stocking “international” cuisine products) so I left it out and didn’t miss it at all.

    The sauce was created from memory so if you have had it more recently and attempt to make it at home please adjust the measurements to your liking.

    I cooked this in a wok but you can use a large sauté pan.

    We had not leftovers!! Like I said this is Bryan’s favorite dish.

    Who says you have to go our to have great Chinese food when  you can easily make it at home!  It may take a little longer to make it but it is so worth it and helps save you a little money too.

    Weekly Menu Planning

    I’m determined to get back into planning out a weekly menu and base our grocery shopping on that menu.  I hope that this will save us money but also the frustration of what to eat each night.  This week is a very Asian inspired week as you’ll see below.  I really miss my favorite little Chinese restaurant in Monterey, Full Moon.  They were so great to me, I would bring them a bottle of gluten-free soy sauce and they would make my food with that. We have both been craving Chinese food lately and Bryan could go out and get some but I can’t so I figured I would make a few Asian inspired recipes this week that will hopefully hit the spot.

    When planning weekly menus I usually look at my cookbooks, blogs etc and search for dishes that are tasty, easy and that the ingredients can be used in more than one dish during the week.  This weeks menu inspiration comes from: Artisanal Gluten-Free Cooking, Everyday Food-Fresh Flavor Fast and a few recipes I found online.

    November 29-December 5

    Monday

    Grilled Steaks, mashed sweet potatoes and corn (these were our last steaks from Omaha Steaks -a gift from Bry’s parents)

    Tuesday

    P.F. Chang’s inspired Beef A La Sichuan (Bryan’s favorite dish to order there, even off of the gluten-free menu)

    Wednesday

    Asian Inspired Noodle Bowl (Artisanal Gluten-Free Cooking pg. 30)

    Thursday

    Beef Stir Fry (Everyday Food Fresh Flavor Fast pg. 190)

    Friday

    Penne A La Broccoli (Light dish with red pepper flakes from DrWeil.com)

    Saturday

    General Chang’s Chicken (Artisanal Gluten-Free Cooking pg. 163) I’ll be making this for my birthday dinner along with some cupcakes, or maybe even a cheesecake…I have yet to decided which one I really want.

    Sunday

    Not 100% sure what to make just yet for sunday, maybe some beef stew or pot roast.

    If you haven’t picked up a copy of the Artisanal Gluten-Free Cooking cookbook by Kelli and Peter Bronski you really should – this cookbook is fantastic.  I’ve made several of their recipes and have enjoyed every one of them.

    What are you cooking this week?

    POM Wonderful Dinner Party (Recap)

    About a month ago I entered a contest to host a POM Wonderful dinner party.  POM would pick 100 people to host a dinner party inspired by, Pomegranates (of course).  I entered at first because Bryan and I love pomegranates, and I really wanted to try to incorporate them into some recipes other than just drinking the juice and eating the seeds.  To my surprise I got an e-mail back saying I was one of the 100 picked and I would be receiving two cases of pomegranates and some goodie bags for my guests.  After getting this e-mail I had about 9 million thoughts running through my head of what to make, how many people to invite and oh I can’t forget the decorations! After sitting back and relaxing for a little bit I decided that simple was the best way to go.

    Bryan and I will hopefully be in New Jersey for Thanksgiving this year and my dad, stepmom and stepsister will all be in upstate New York, so I figured we would do a pre-Thanksgiving inspired dinner together yesterday, just the five of us. Keeping with the Thanksgiving theme our menu was as follows:

    Starter:

    Salad with Pomegranate Seeds and a Pomegranate Balsamic Dressing

    Main:

    Roasted Chicken with Pomegranate Glaze

    Mashed Sweet Potatoes

    Garlic Green Beans

    Pomegranate-Cranberry Sauce

    Biscuits

    Drink:

    Hard Pomegranate – Apple Cider

    Dessert:

    Brownie Cupcakes topped Pomegranate Cream Cheese Frosting

    Pomegranate Sorbet

    Over all our dinner was great- with a few minor setbacks of having a small kitchen, sink and not being happy with my frosting!  It was nice to have my family here for a relaxing afternoon filled with football and a very tasty dinner (If I do say so myself).  Our decorations were simple – some small pumpkins in the center and on each plate was a pomegranate and an instruction card on “how to open a pomegranate”. Most of the recipes used were ones that we make often, simple yet very tasty and all 100% Gluten Free! Below are some of the recipes with photos.  (I must note that I got caught up in feeding everyone that I forgot to take a few photos, such as the roasted chicken when it came out of the oven-sorry!)

    Salad with Pomegranate-Balsamic Dressing

    (We usually have mixed greens and what ever else we can throw into the salad, it is completely up to you)

    One -two large romaine lettuce heads, chopped (Or mixed greens)

    1/2 cup sliced carrots

    1/2 cucumber sliced

    1/2 cup cherry tomatoes (optional)

    1/4 cup pomegranate seeds

    Pomegranate-Balsamic Dressing

    Salt and Pepper

    1/2 cup of good olive oil

    1/4 cup pomegranate juice

    1/8-1/4 cup balsamic dressing

    Add all ingredients to a covered jar or salad dressing mixer.  Shake well and enjoy (you can adjust the measurements to your flavor liking)

    Roast Chicken with Pomegranate Glaze

    1 Whole Chicken (about 9 pounds)

    1/4 cup room temp butter

    1 1/2 tablespoons of Seasoning of your choice – I use a mixture of rosemary, thyme, oregano and sage.

    Salt and Pepper

    Preheat oven to 375 degrees.

    In a small bowl mix the softened butter and herbs until well combined. Set aside

    Make sure the giblets and neck are removed from the chicken cavity.  Rinse the chicken and pat dry with paper towels.  Season with salt and pepper – also season the cavity. Place your chicken in the roasting pan and gently lift the skin using your fingers – be sure not to tear any of it.  Once the skin  has been lifted, take  half of the butter and herb mixture and spread evenly under the skin.  Take the remaining butter and herb mixture and do the same over the top of the chicken.  Place chicken in oven.  About thirty minutes into cooking add about 1 cup of chicken stock to the bottom of the roasting pan and baste the chicken.  Continue to baste the chicken every 30 minutes.  (please be sure to check the size of your chicken to determine how long it should roast for).  For a 9 pound chicken, cook for 2 – 2 1/2 hours.

    During the last thirty minutes of the chicken brush it with the pomegranate glaze (see recipe below) every ten minutes, do this again when your chicken has been removed from the oven. This sauce can also be drizzled over the meat on your plate (which I did)

    Pomegranate Glaze

    (Very concentrated flavor, and very good)

    1 cup POM Wonderful Pomegranate Juice

    In a small sauce pan heat the pomegranate juice over medium heat.  Simmer until juice has reduced about half, about 10-12 minutes.

    Mashed Sweet Potatoes

    (We love mashed sweet potatoes, especially with the cinnamon added.  We tend to eat more sweet potatoes than regular ones)

    1 – 1 1/2 pounds of sweet potatoes, peeled and chopped

    1/2  – 1 teaspoon ground cinnamon

    1 tablespoon butter

    1/4 cup soy milk

    salt and pepper to taste

    In a medium sauce pan add sweet potatoes and cover with water.  Boil for ten minutes or until the potatoes are fork tender.  Drain well.  Either by using a potato masher or using a stand mixer add your potatoes to a large bowl (or bowl of a stand mixer), add butter and soy milk and begin mashing (or whisking), until smooth.  Season with cinnamon and mix again until well blended.  Season with salt and pepper.

    Garlic Green Beans

    (one of our favorite side dishes, quick, easy and very flavorful.  This replaces the green bean casserole on our table)

    1-2 pounds of fresh green beans

    3 large cloves of garlic finely chopped

    1 tablespoon butter

    1 tablespoon olive oil

    Salt and pepper

    Lightly steam the green beans until bright green yet still crispy.  Drain well.  In a medium-large pan melt butter and olive oil over medium heat.  Add garlic and stir in the green beans.  Toss the green beans so they are all coated in the garlic and butter/oil sauce.  Season with salt and pepper.

    Pomegranate-Cranberry Sauce

    (I usually make this a day in advance)

    1 Bag (12 oz) fresh cranberries

    1 cup pomegranate juice

    1/2 cup sugar – you can use either with sugar or packed brown sugar (I used the brown sugar this time)

    1/4 – 1/2 teaspoon ground cinnamon (optional)

    salt and pepper

    1/2 cup pomegranate seeds

    In a medium saucepan – over medium/high heat add the pomegranate juice and sugar. Bring to a boil.  Add the fresh cranberries, once the berries start to pop open reduce heat and simmer, stirring occasionally.  Cook until most of the cranberries have burst open and the sauce has thickened a bit, about 10 minutes.  Remove from heat and add in the pomegranate seeds.  Cool  to room temp before serving (or if you are making this in advance like I do (I think it tastes better the next day) cool completely and transfer to an air tight container.

    Biscuits

    I used the recipe on the back of the Betty Crocker Gluten Free Bisquick box.

    2 cups Gluten Free Bisquick mix

    1/3 cup shortening

    2/3 cup milk (I use soy)

    3 eggs

    Heat oven to 400 degrees

    Cut shortening into mix, using fork, until particles are size of small peas.  Stir in remaining ingredients until soft dough forms.  Drop by spoonfulls onto un-greased cookie sheet. Bake for 13-16 minutes or until golden brown.  Makes 10 biscuits.

    Hard Pomegranate-Apple Cider

    (We used a local hard apple cider from Newport Vineyards, which is right down the road from us)

    Serves four

    3 parts hard apple cider

    1 part pomegranate juice

    In wine glasses (or any fun glasses you might have) add three parts hard apple cider and one part pomegranate juice and stir lightly.  Serve chilled.

    Brownie Cupcakes with Pomegranate Cream Cheese Frosting

    12 Brownie Cupcakes (I used the Bob’s Red Mill Gluten Free Brownie Mix and made them in a cupcake pan – you can use which ever brand you like).  Make these the night before so they can cool and that is one less thing to bake the day of.

    Pomegranate Cream Cheese Frosting

    (sadly below isn’t the recipe that I used, I made my own but it didn’t have much pomegranate flavor so I suggest using this one instead)

    8 oz cream cheese softened (room temp)

    4 oz butter softened

    3 oz of pomegranate juice (juice from 3-4 large POM Wonderful Pomegranates,* or 1-1/2 cups POM Wonderful 100% Pomegranate Juice)

    14 oz Powdered sugar

    1 cup arils from 1 large POM Wonderful

    Prepare fresh pomegranate juice*, score 1-2 fresh pomegranates and place in a bowl of water, break open the pomegranates under water to free the arils (seed sacs), the arils will sink to the bottom of the bowl and the membrane will float to the top, sieve and put the arils in a separate bowl. Reserve 1 cup of the arils from fruit and set aside, (refrigerate or freeze remaining arils for another use), reduce the pomegranate juice, over low heat, down to 3 fl. oz., Allow to cool, place butter into electric mixer bowl with paddle attachment and cream on medium-high speed for 1 minute, add the cream cheese and continue to mix for 2 more minutes, turn the speed down to low and slowly add in the powdered sugar and the pomegranate juice reduction, mix until the sugar is fully combined, remove icing from the mixer and place into a piping bag with a round or star tip.

    Pomegranate Sorbet

    (I have never made sorbet before so I asked my stepmom to use her ice cream maker so I could attempt making pomegranate sorbet.  I found the following recipe online at Saveur and it is very flavorful and refreshing!)

    1/2 cup sugar

    3 cups pomegranate juice

    1 Cup water

    Place sugar, 1 cup water, and pomegranate juice in a large saucepan. Bring to a boil over low heat, stirring constantly. Remove from heat and cool to room temperature. Refrigerate until well chilled. Process in an ice cream maker according to manufacturer’s instructions. Serve garnished with pomegranate seeds. (This article was first published in Saveur in Issue #9)


    Our table setting

    Our POM Wonderful inspired meal

    To make our Hard Apple-Pomegranate Cider we used a local hard cider from Newport Vineyards (It’s the best we’ve had)

    A light refreshment – Hard Apple-Pomegranate Cider

    “How To Open A Pomegranate”

    A simple yet flavor packed and refreshing dessert – Pomegranate Sorbet

    Each guest got a POM Swag-Bag which included a POM bracelet, POM recipe cards, POM pamphlet, a free coupon for a bottle of POM wonderful juice and an awesome reusable POM wonderful tote.  They also got to take home a few pomegranates.


    Creatively and Frugally Gluten Free

    We’ve all been hit hard with the economy the way that it is and if you are like myself, you’ve been hit a bit harder because I am still out of work.  I wasn’t laid off or anything, I willing left my job and life in California to move back East to be with Bryan.  I don’t regret my decision by any means – I think it was one of the best decisions I have ever made. If I didn’t move in the summer who knows if or when it would have happened.  There were other factors (like our families) into moving when I did but he was the main reason.  Seeing as I left my job, I do not collect unemployment and have no income or health insurance. I spend my days searching and applying for jobs – which is usually about 20 jobs!  I’m not being picky and only applying for certain jobs, I am applying to anything and everything that I remotely qualify, however the call backs are scarce. sparse.  Honestly as depressing and defeating as it is, I keep doing it every day.  I know something will come along, I just hope it happens soon. It is funny because the few responses I have received back say I am over qualified and that is one thing I have never been told in my life, usually it is the opposite because even though I have about 10 years of administrative work under my belt (mostly in Higher Education admissions) I am under qualified because I don’t have a Bachelor’s degree (actually any degree for that matter).

    I would love to someday have the ability to donate my time with an organization or be a part time food blogger and work part-time, but right now we need me to be working.  I enjoy working (and earning a pay check) actually I miss working.  People keep telling me that once I get a job I’ll be wishing for this time again, and I’m sure I will at some point but I think it might take a while for me to feel that way.

    So with being out of work for a total of four months we have learned to not only live the gluten-free life creatively but also frugally!  I am a coupon clipper and at first Bryan would make fun of me for it but I think now he is pretty thankful for my OCD with coupons.  Each week when we get the grocery ads I scour them looking for the good sales.  We normally don’t buy anything that isn’t on sale.  I’m a big fan of the buy one get one items.  We buy more fresh items vs. processed items.

    I also try to make as many gluten-free things that I possibly can instead of buying them at the stores such as granola, bread, salad dressings, cookies, ice tea, mochas, cakes and pies.  Sadly however, I am running low on all of my gluten-free flours and my xanthan gum! So I have to be careful until I can afford to order some new ones.  Today I was trying to think of other things I can make at home with the ingredients I have on hand instead of buying.  One thing that came to mind is taco seasoning.  We eat tacos fairly often because it is a quick and easy meal that we both enjoy.  So I did some searching around online to find out what people really put in taco seasoning because the packages are a bit vague listing “spices” – well that is obvious but which ones? Here is what I came up with, and should probably note we really enjoy spicy foods in our house so you might want to adjust this recipe to your level of spice preference.  We tried this tonight and it was really good, if I do say so myself!

    CCGF’s Taco Seasoning (GF/OF/DF)

    1 Tablespoon Corn Starch (I noticed some people used Potato Starch or Corn Flour)

    1 Teaspoon Chili Powder (make sure it is gluten-free!)

    1 Teaspoon Paprika

    3/4 Teaspoon Salt

    1/2 Teaspoon Cumin

    1/2 Teaspoon Cayenne Pepper (You might want to use only 1/4 teaspoon if you don’t like much spice)

    1/2 Teaspoon Chipolte Pepper (You can omit this or use 1/4 teaspoon)

    1/4 Teaspoon Garlic Powder

    1/4 Teaspoon Sugar

    Add all of the ingredients to a bowl or plastic bag, mix well.  Store in an airtight container.

    Tacos:

    1lb – 1 1/2lb ground beef or turkey

    Taco Seasoning (see above)

    2/3 Cup water

    Corn tortilla shells -hard or soft

    Shredded lettuce (optional)

    Shredded cheese (optional)

    Sour cream (optional)

    Avocado (optional)

    In a large skillet on medium heat, brown beef and drain off any fat, about 8-10 minutes.  Add taco seasoning stir until well combined then add water.  Simmer over medium heat until sauce has thickened, about 3-4 minutes.  Serve in taco shells with your favorite toppings.  You can even make nachos with this instead!

    Here is to living the gluten-free life creatively and frugally!


    Getting Setteled with some Spicy Orange Chicken

    Well we are here….finally!  At some points I wasn’t sure if it was ever really going to happen.  I move out of my apartment in Monterey on June 1st, moved in with some great friends, flew to New Jersey on July 9th and we moved into our condo in Rhode Island on July 31st.  I have been living out of suitcases for two months and was beyond ready to be here and unpack.  The move went very smoothly thanks to all of the help that we had! The unpacking wasn’t so bad either.  It was so much fun combining our things and styles, finding places for everything and getting to hang our artwork up (we are both Photographers).  My favorite part of our new place is the built-in bookshelves that house our camera collection. See Photos at the end of this post 🙂

    We are starting to find our way around Portsmouth, Newport and Bristol.  We live between two vineyards (that we hope to try really soon).  One a mile East and one a mile South of our condo!  Today we visited the farmer’s market that is held at one of the vineyards every Saturday.  It’s a bit small compared to the one in Monterey but it’s awesome!  I found a few stands that had some gluten-free items, not many but it’s a start at least.  We even found a stand that had fresh edamame right on the stalk/branch still!!

    Sadly though I haven’t had a chance to do too much baking/cooking but I’m getting there.  I need to find a job still so much of my free time has been spent searching for a job in this not so great economy!  I’m very used to working in higher education but at this point I will take any job that comes my way, including working at a grocery store, bookstore etc…you name it and I’ll pretty much do it as long as we have money coming in.  This whole gluten-free lifestyle, food, flours etc. are just so expensive.  So once I get a job and have some money coming in I’ll be able to stock up on all my gluten-free flours but until them I am searching for recipes to make with the little that I have. Growing up money was tight very often so my mom was great at making meals that would go the distance and either last a while or you could make those leftovers into a completely different meal.

    My first big meal was my grandmother’s gravy and meatballs, which I froze a good amount of it for later use and we ate that for about three nights in a row!  We stocked up on gluten-free sandwich meat, chicken breast, hot Italian sausage and a few other things at B.J.’s.  Of course we had Bryan’s favorite – Sweet and Spicy Chicken one night too.  Yesterday I realized I had about a half a cup of brown rice flour left so I decided to make Bryan a little treat, some yummy gluten-free brownies.  I was getting a bit frustrated today because every time I thought of a recipe to make tonight for dinner or something to bake I was short by either one or two (simple) ingredients.  I’m not used to not having certain things in my house anymore, like yeast, rice vinegar, ginger, vanilla extract etc…really simple things but we just haven’t had a chance to buy them just yet.  So we broke down today and picked them up.  I’m very excited to be able to make some bread next week!!

    Tonight I decided to make another meal that is great to freeze, has lots of flavor and makes great leftovers.  Spicy Orange Chicken Stir-fry from Martha Stewart’s Everyday Food Magazine (Issue #50, March 2008 pages 80-81).  My only suggestion would to be use a little less orange juice than it calls for, but that is just me…

    Spicy Orange Chicken Stir-fry

    1/3 Cup Cornstarch

    2 Cups Orange Juice (see above…I would use about 1 1/2 cups instead)

    1/2 Cup Gluten-Free Soy Sauce (recipe calls for regular)

    1/2 Cup Rice Vinegar

    1/4 Cup Honey

    4 Garlic Cloves, Minced

    1 to 2 Teaspoons Red-Pepper Flakes (I used 2)

    Coarse Salt

    1 Tablespoon Vegetable Oil

    3 Pounds Boneless, Skinless Chicken Breasts, Cut Crosswise  into 1/2 Inch-Wide Strips

    1 Head Broccoli, Cut Into Florets, Stalks Peeled and Thinly Sliced

    1 Pound Carrots (about 5), Peeled and Thinly Sliced on the Diagonal

    Cooked Rice for serving

    • Place cornstarch in a medium bowl.  Gradually whisk in orange juice until smooth.  Whisk in soy sauce, vinegar, honey, garlic and red-pepper flakes; season with salt. Set mixture aside.
    • In a 5-quart nonstick Dutch oven or pot, heat oil over medium-high heat.  Working in batches, cook chicken on the one side until slightly browned, 2 to 4 minutes; transfer to a plate, and set aside (chicken will cook more later).
    • Add broccoli, carrots, and 1/2 cup water to pot.  Cook, partially covered, until water has evaporated and broccoli is bright green, 3 minutes.  Add reserved chicken and cornstarch mixture; bring to a boil.  Cook until chicken is opaque throughout and sauce has thickened, 2 to 3 minutes.  Serve stir-fry over rice.

    Additional Suggestions:

    Add any of the following vegetables: edamame, snap peas, cauliflower

    To Freeze:

    Prepare through step 3, omitting rice; cool to room temperature.  Freeze 1 1/2 cup servings in airtight containers.

    To Cook From Frozen:

    Run container(s) under hot water to release frozen stir-fry.  Place in a medium saucepan with 1/2 cup water per serving.  Cover and heat over medium high, stirring occasionally, until heated through, 10 to 12 minutes.

    To see more photos of our place please check out my Flickr Page: Mia Cara Photography

    Garlic-Basil Shrimp

    This super simple recipe has become one of my favorites (and Bryan’s too I think).  Its from the “So Easy” cookbook by Ellie Krieger.  You really have to give this a try and best part, the original recipe almost 100% naturally gluten free.  The only substitution I have to make is instead of orzo pasta, I use either white or brown rice

    Garlic-Basil Shrimp by Ellie Krieger

    2 tablespoons olive oil

    1 1/4 pounds shrimp (20-25 per pound), peeled and deveined (I used tail on frozen shrimp)

    3 garlic cloves, minced

    1/8 teaspoon crushed red pepper flakes or more to taste

    3/4 cup dry white wine

    1 1/2 cups grape tomatoes, halved

    1/4 cup finely chopped basil

    salt and freshly grounded black pepper, to taste

    3 cups of brown or white rice (original recipe calls for whole wheat orzo pasta)

    Heat the oil in a large heavy skillet over medium-high heat until hot but not smoking, then add the shrimp and cook, turning over once, until just cooked through, about 2 minutes.  Transfer with a slotted spoon to a large bowl.

    Add the garlic and red pepper flakes to the oil remaining in the skillet and cook until fragrant, about 30 seconds.  Add the wine and cook over high heat stirring occasionally, for 3 minutes.  Stir in the tomatoes and basil and season the sauce with salt and pepper.  Return the shrimp to the pan and cook just until heated through.  Serve with rice (or orzo).

    Sweet Potato Fries

    DSC_0388

    You know those nights where all you want is a cheese burger and fries?? Well tonight was one of them…minus the cheese burger. At last weeks farmer’s market I picked up two sweet potatoes and figured, why not make fries out of them tonight.

    Sweet Potato Fries

    2 medium – large sweet potatoes

    1 teaspoon of sea salt

    1/2 teaspoon black pepper

    1 garlic clove minced

    1/2 teaspoon paprika

    enough olive oil to coat the fries

    Peel and cut sweet potatoes in 1/4 inch pieces (try to get them as even in size as possible so they cook evenly) In a small bowl combine the garlic, salt, pepper and paprika. In a large bowl coat them with oil, season with the seasoning mixture. Cover a large baking sheet with parchment paper. Place the coated “fries” on the baking sheet and bake for 20 minutes in a 450 degree oven, turning once.

    Let cool and enjoy with your favorite dipping sauce or ketchup.

    I’ve had sweet potato fries before with different kinds of dipping sauces, all different and all very tasty. I’ve had a few may based sauces, and normally I wouldn’t even think to dip a fry in mayo. I actually don’t eat much mayo anymore but happened to have some in the fridge so I thought I would try and make one myself:

    Sweet Potato Fry Dipping Sauce

    1/2 cup fat free mayo

    1 tbl spoon fresh lemon juice

    1 clove of garlic minced

    1/2 teaspoon salt

    1/2 teaspoon black pepper

    Combine all ingredients and mix well.

    DSC_0383

    DSC_0386

    Frittata

    DSCN2296

    Today I made my first frittata. I looked in my Essentials of Classic Italian Cooking cook book to get the basic idea of how to make a frittata and just ran with it. I looked to see what I had, pancetta, fresh spinach, baby potatoes, onion, garlic and rosemary and just used all of it. I have to say it came out pretty darn good.

    I like many other cooks don’t always measure. I learned that from my grandmother. It was always a pinch of this, a dash of that. Many times I find it hard to actually follow a recipe, I tend to read them, get the basic idea and adapt them. So if these amounts are not accurate, I’m sorry.

    Frittata

    1 package of diced pancetta

    1 small onion diced

    1 1/2 cups firmly packed fresh spinach leaves chopped

    4 small potatoes – cubed

    1/4 cup olive oil

    6 eggs

    two cloves of garlic minced

    2 sprigs of rosemary chopped

    1/2 cup heavy cream

    1 tsp pepper

    1/2 cup parmsean cheese

    Turn oven to 350 degrees

    In a small skillet sautee the pancetta until lightly browned. With a slotted spoon transfer the pancetta to a plate lined with paper towels. In the same pan sautee the onions until lightly browned (3-5 minutes). In a 10 inch sautee pan add the oil and cubed potatoes. Cook until softened and browned, about 8-10 minutes. Once the potatoes are fork tender, add the onions and pancetta to them, keep on low heat. Sautee the spinach and garlic in the pan you used for the onions and pancetta. Add to the potatoes

    While the potatoes cook beat the eggs, rosemary and cream in a medium bowl. After the spinach and garlic has been added to the potatoes, add in the beaten egg mixture. Cook over low heat until eggs have set and the top is still loose.

    Sprinkle with cheese and put in the pre-heated oven for 15 minutes until set and lightly browned on top. Take out of oven, cool for a few minutes. Loosen the frittata by running a rubber spatula around the edges of the pan. Transfer to a plate and slice like you would a pie to serve.

    DSCN2286DSCN2288DSCN2290DSCN2293DSCN2299

    Edamame Hummus and Corn Chips

    DSCN2119

    DSCN2120

    The Edamame Hummus is from Ellie Krieger and the chips are mine.

    Edamame Hummus:

    • 2 cups shelled edamame, cooked according to package directions
    • 1 cup silken tofu, briefly drained of excess liquid
    • 1/2 teaspoon salt, plus more to taste
    • 3 cloves garlic
    • 1/4 cup olive oil
    • 1/3 cup lemon juice, plus more, to taste
    • 1 1/2 teaspoons cumin, plus more, for garnish

    Set 1 tablespoon of edamame aside for a garnish. Place the rest of the edamame, tofu, salt, garlic, oil, lemon juice[, and 1 1/2 teaspoons cumin in the bowl of a food processor and process until very smooth, about 2 minutes. Season with additional salt and pepper, plus more lemon juice, if desired. Remove to a serving bowl and garnish with reserved edamame, and some cumin.

    Corn Chips:

    Six Corn Tortillas

    2 Teaspoons lime juice

    1/2 Teaspoon sea salt

    3 Table Spoons Veggie Oil

    Cut the corn tortillas in half and then in thirds.  Place them on two non-stick cookie sheets.  In a small bowl mix together the remaining ingredients.  Brush the mixture over the tortilla chips.  Bake in a 350 degree oven for 12-15 minutes.  Let cool.

    Gramma Lu’s Chicken

    gf1627

    My grandmother is a great cook. We all have grown up loving and craving her cooking (especially her meatballs and sauce). All of her recipes are stored in a brown folder that has been coveted by every female in my family!! Knowing that there would come a time that we would all want these recipes from her but only one person would end up with the folder, my Aunt Sue, my sister and I decided to put all her recipes in a “cook book” and give it to our family as Christmas presents one year.

    I have to give her credit for my love of cooking. I remember being very young and her pulling up a chair for me to stand on next to her while she taught me how to make chicken soup from scratch.

    Gramma Lu makes the best chicken wings (to me anyway). Ever since I was little I looked forward to these chicken wings of hers.

    I didn’t have chicken wings or pineapple juice so I adapted the original recipe. I substituted the wings for drumsticks and omitted the pineapple juice and added a teaspoon of ginger. (The original recipe is below along with the ginger)

    Gramma Lu’s Chicken Wings

    1/2 cup orange juice

    1 cup gluten free* soy sauce

    1/4 cup pineapple juice

    3 cloves of garlic minced

    1 teaspoon of minced ginger*

    1-2 lbs of chicken wings (or drumsticks)

    ~Combine first four five ingredients and mix well. Add chicken and marinate overnight. Place chicken in a single layer on a cookie sheet. Bake for 1 hour at 350 degrees, turn once half way threw. Serve Hot.

    (for drumsticks cook at 375 degrees for fifty minutes turning once. Turn oven to Broil and broil for five minutes or until skin is crispy).

    Noodles in hot ginger and garlic broth

    gf1583(Adapted from the recipe Noodles in hot ginger broth from the cook book: Allergy-Free Cooking)

    Noodles in hot ginger and garlic broth

    5 cups of gluten free chicken stock

    large chunk of fresh ginger (about 1/2 ounce) peeled and fine julienne strips

    3 tablespoons gluten free soy sauce

    2 garlic cloves finely chopped

    7 0z of rice noodles (thin or medium)

    8 baby corn, halved lengthwise

    4 scallions sliced diagonally

    1 packet of shitake mushrooms sliced (there are usually about 8-10 mushrooms in a pack)

    (The originally recipe calls for 2 bok choy roughly chopped, and 1/2 cup of bean sprouts…I didn’t have any so I made it with out)

    Simmer broth, ginger, garlic and soy sauce for 3 minutes.

    Bring to a light boil and add noodles. Cook as directed on package.

    In a sautéed pan add one tablespoon of oil, and sauté baby corn to give a bit of color, then add the mushrooms. Cook for 1-2 additional minutes

    Carefully add the baby corn and mushrooms to the pan of broth and noodles.

    (If following the original recipe, add the bok choy, simmer until tender. Add bean sprouts at the very end

    Simmer for an additional two minutes.

    Garnish with scallions.

    Serves 4.