Coconut Thai Shrimp w/ Mango Avocado Salsa and Spinach Lime Rice

IMG_0058This time of year is perfect for fresh seafood – especially in New England. Lately I have been consuming about a 75/35 diet…the 75 being vegetable/plant-based meals and the 35 being meat based meals. I am working towards consuming the recommended 8-12oz of fish/seafood per week according to the 2010 Dietary Guidelines for Americans, however my budget does not always allow it, especially when trying to consume wild caught fish/seafood. Living below the poverty line, trying to make ends meet, and living on a tight budget can make things a difficult and frustrating when trying to eat healthy and buy fresh ingredients all the time. I have been living this way for quite a while now, and for the next year, that tight budget of mine just got even tighter! So here are a few little tips and tricks that I have found helpful and put to use:

  • When I find a good deal on wild caught seafood, I buy a little extra and freeze it into appropriate portion sizes.
  • Search the frozen section – some times you can find wild caught pre-frozen shrimp, tuna, or salmon – pick up a piece or two and save it for a raining day.
  • Shop local – small independent grocery stores and farmers markets usually have some great deals.
  • Eat Seasonally – the best prices for items are when they are in season, that should be no surprise.
  • Coupon Clipping – I kid you not, this has helped me so much. I do not clip coupons for items that I can not eat or that I do not use, that would be a waste of money and time. Sign up for coupons from Mambo Sprouts – usually they have lots of great gluten-free related coupons.
  • Frozen Veggies and Canned Goods – I know it is not “gourmet” but you can make one heck of a meal with these items…if buying canned goods, buy them with no or low sodium, and be sure to rinse them well. I buy my beans canned because it is quick and easy and they are full of nutrients.
  • Think of side of the box – instead of spending loads of money on meat proteins, I use a lot of alternative proteins like tofu, tempeh, and beans
  • Whole grains – they fill you up and are very versatile.

Below is a simple, yet flavorful shrimp recipe that can be prepared inside or on the grill and is perfect for this beautiful weather. You can serve it with our without the rice, in taco shells, or however you choose.

I found the Coconut Thai Seasoning at The Spice and Tea Exchange in Newport…I have no idea how I never realized this little gem was so close to me, but it was probably a good thing for me (not them) that I didn’t! I walked into the shop and instantly was in heaven. It’s a small shop, packed with spices, teas, salts, etc. The staff was very helpful and friendly as well, especially when helping me with gluten-free blend options. I picked up a few different spice blends but had to try the Coconut Thai one first.

Coconut Thai Shrimp with Mango Avocado Salsa and Spinach Lime Rice

IMG_0061Coconut Thai Shrimp – Ingredients

  • Shrimp                                                         1/2 pound
  • Coconut Thai Seasoning                         2 teaspoons
  • Olive Oil                                                       1 teaspoon

Mango Salsa – Ingredients

  • Lime Juice                                                  2 tablespoons
  • Lime Zest                                                    1 teaspoon
  • Salt, Kosher                                               1/4 teaspoon
  • Cayenne Pepper                                       1/8 teaspoon
  • Mango                                                         1 – fine dice
  • Red Onion                                                  2-3 tablespoons, fine dice
  • Avocado                                                      1 – fine dice
  • Bell Pepper, Orange,Yellow, etc.            1/4 cup, fine dice

Spinach Lime Rice – Ingredients

  • Basmati or Jasmine Rice                        1 cup – uncooked
  • Water or stock                                             2 cups
  • Spinach, Baby                                             1 1/2 cups
  • Lime Zest                                                     1 teaspoon
  • Cilantro                                                         1 tablespoon, fine chop

Method of Preparation

  1. Peel and devein shrimp
  2. Mango Avocado Salsa – In a medium bowl add lime juice, lime zest, salt, and cayenne pepper – mix well.
  3. Add diced mango, red onion, avocado, and bell pepper, mix well.
  4. Cover and refrigerate for 30 minutes
  5. Coconut Thai Shrimp – In a medium bowl add, Coconut Thai Seasoning and Olive oil, mix well
  6. Add shrimp and toss to coat evenly, set aside in the refrigerator for 10 minutes
  7. Spinach Lime Rice – In a small stock pot bring two cups of water or stock to a boil and add rice. Stir and cook until done (usually about 15-20 minutes depending on rice)
  8. During the last two minutes of cooking, stir in spinach and stir to wilt the spinach leaves. Set aside.
  9. Right before serving add lime zest and freshly chopped cilantro into the spinach rice and toss to evenly incorporate.
  10. To cook the shrimp – either heat a medium skillet over medium-high heat and cook 2-4 minutes per side or place on a hot grill for the same amount of time.
  11. Serve with spinach lime rice, and mango salsa – top with fresh cilantro and lime wedges if desired.

Enjoy!


Spicy Thai Coconut Soup with Shrimp and Chicken

ip 439

I just completed my winter term of school and about to begin my spring term which also happens to be my last term of academics before graduating! I can’t believe that in 78 days (yes I am counting) I will walk across the stage at graduation and receive my degree in Culinary Nutrition from Johnson & Wales University. This is a dream come true. All of the hard work, sacrifices, and dedication during these last three years will be worth that moment. This is a day I never thought I would see, especially at the age of 32! Even though this journey has been difficult and I have missed out on many things, I know it is all worth it. Without the support of my family and friends I know I wouldn’t be here and to them, I am truly thankful.

In my last post I mentioned that I have been MIA from here for a while because I have been applying to Dietetic Internship programs. This is a pretty competitive process and I have given my all in these applications and the three years leading up to them. I will be notified on April 6th if I have been selected or not. Until then, it is a waiting game that is completely out of my control. I am hoping for the best and if selected I will give this program my all. If I am not selected, I will continue to work hard and apply again next year.

Thank you all for your support, encouragement, and for being faithful followers and readers of Creative Cooking Gluten Free over these last six years. Thank you for understanding that I am only one person and cannot post daily on here. Between school, work, homework, and volunteering, I just do not always have the time. I hope to be better about it this term however, and provide you all with some new delicious gluten-free and allergy-friendly recipes.

Below is a recipe I created this past term at school – it is originally designed for an athlete on a heavy training day so I had to adjust the amounts to work for everyone. Please feel free to adjust the spice level to your liking and you can always switch out the shrimp and chicken for more veggies if you prefer.

Spicy Thai Coconut Soup with Shrimp and Chicken

ip 441

Ingredients:

Amount                                   Ingredient

  • 1 pound                                     Shrimp, large, cleaned, deveined, shells removed and set aside
  • 6 cups                                       Stock, seafood, chicken, or vegetable
  • 1 pound                                     Chicken breast, boneless, skinless
  • 1/3 cup                                      Mushrooms, crimini, shitake, etc., sliced
  • 1/4 cup                                     Carrots, julienned
  • 1/4 cup                                     Zucchini, julienned
  • 2 cans                                      Coconut Milk, full fat
  • 1/2 cup                                     Rice, White or Basmati, uncooked
  • 2 inches                                   Ginger, cut in half
  • 3 cloves                                    Garlic, smashed
  • 2 small                                     Lime, juice and zest (save one lime for garnish)
  • 6  medium                                Thai Chili Peppers, cut 3-4 in half (for less spice remove seeds)
  • 2-3 tablespoons                        Cilantro, chopped or torn
  • 2 tablespoons                           Scallions, sliced on a diagonal
  • 2 teaspoons                             Salt, Kosher (more to taste if needed)
  • 2 tablespoons                          Oil of your choice (Olive, Canola, etc.)

Method of Preparation:

  1.  Gather all ingredients and equipment.
  2.  Clean, devein shrimp, and save shells. Set aside cleaned shrimp
  3.  Slice chicken breast into thin strips and set aside.
  4.  Clean mushrooms, and slice thin and set aside.
  5.  Wash carrots and zucchini, julienne, and set aside.
  6.  In a high sided sauté pan heat oil over medium heat.
  7.  Add shrimp shells and cook for five minutes.
  8. Add in ginger, garlic, lime, and Thai chili pepper(s) and cook for an additional 2 minutes.
  9. Add stock and simmer for 15 minutes over low heat.
  10. Strain stock and discard any solids.
  11. Return stock to pan and bring to a boil.
  12. Add mushrooms, carrots, and zucchini and cook for one minute, remove and set aside
  13. Add rice, cover pan and cook for 15 minutes or until tender.
  14. Stir in coconut milk and mix until incorporated and all solids have dissolved.
  15. Turn heat to medium low, add in chicken, and shrimp. Cook for 3-5 minutes or until proteins are cooked throughout.
  16. Return the vegetables to the pan and stir well.
  17. Check for seasoning and adjust if needed.
  18. Serve in a bowl with a slice of lime fresh Thai chili pepper(s), and chopped cilantro.
  19. Hold at 135° or warmer.

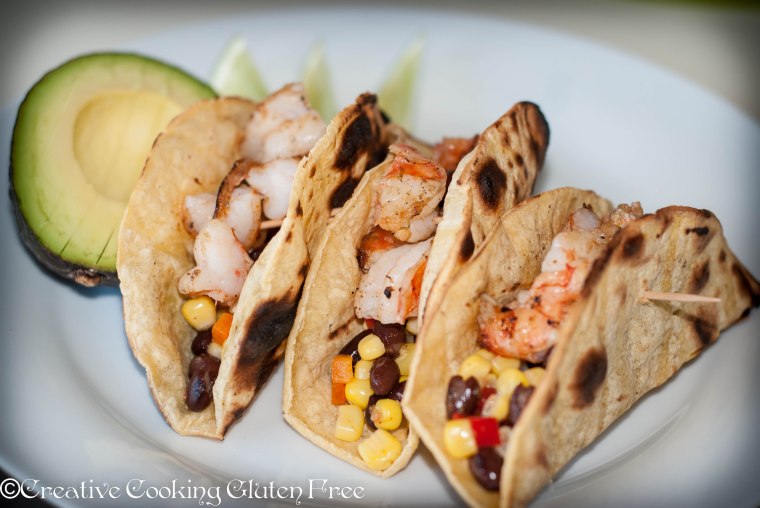
Grilled Shrimp Tacos with Corn & Black Bean Salsa

Shrimp-0051

I would grill all year-long if I could. This year we had so much crazy snow drifts that it was a bit impossible to do. I love my grill dearly…great flavors, you can grill pretty much anything, its outside with the sun and the fresh air, easy clean up, and less fats are used! We grill steaks, chicken, burgers, hot dogs, hot sausages, shrimp, fish, pizza, and veggies…tons of veggies! Last year I bought one of those little grill baskets for I think $3.00 and it works like a charm, especially for mushrooms.

Last week we got the tank refilled and have used it quite a bit since. We are both trying to get in better shape and eat healthier (a follow-up post to my I’m on a mission…post will appear soon, I promise!). So the grill comes in very handy for this, because like I mentioned I use way less oils or fats when cooking. We have switched from eating red meat weekly (sometimes multiple times a week) to about monthly and started eating more chicken (breasts, no skin – which we have always done), shrimp, vegetables, whole grains, and legumes.

Since starting to work out and now that I have gotten on a schedule with a program I really like I have been craving much healthier foods…funny how that works huh? Snacks include slices of yellow, red, or orange bell peppers, or carrot sticks with hummus and mandarins! Seriously I never ate peppers or any form of oranges, but loved orange juice. Now I can’t seem to get enough of them. For lunch I have been buying Boar’s Head low sodium meats and making little “roll-ups” with some low sodium cheese, and baby spinach. I’m really like this craving of healthy foods! More to come on all of this in my follow-up post mentioned above, but for now let’s get back to the Grilled Shrimp Tacos…

These are SO easy to make, light, and delicious – we are loving this little creation of mine. As with the majority of my recipes please feel free to adjust the seasonings and spices to your flavor likings!

Grilled Shrimp Tacos with Corn & Black Bean Salsa

IMG_5380_5585

Salsa

Ingredients

  • Lime Zest                                                                  1 lime
  • Lime Juice, Fresh                                                     2 limes
  • Cayenne Pepper                                                      ¼ teaspoon
  • Salt, Kosher                                                             1/8 – 1/4 teaspoon
  • Black Pepper, freshly ground                                   1/8 teaspoon
  • Corn, rinsed & drained                                             1 can (14oz)
  • Black beans, no salt added rinsed, & drained          1 can (15.5 oz)
  • Red Bell Pepper, small dice                                      ¼ cup
  • Orange Bell Pepper, small dice                                ¼ cup

Method of Preparation

  1. Gather all necessary equipment
  2. In a medium bowl zest one lime. Zest the second lime used later for juicing and set aside zest for the shrimp marinade.
  3. Juice the two limes into the bowl
  4. Add cayenne pepper, salt, and black pepper, mix until well combined. Set aside
  5. Open cans of corn and black beans. Drain and rinse corn first, and then add to a medium bowl.
  6. Drain and rinse the black beans and add to the bowl with the corn and lime juice mixture.
  7. Dice bell peppers and add to the corn, black beans, and lime juice mixture.
  8. Mix well, cover and store in the refrigerator for 1 hour.
  9. Mix well before serving.
  10. Serve with grilled shrimp tacos and/or corn tortilla chips.

Grilled Shrimp Tacos – makes six tacos

Ingredients

  • Olive Oil                                                                      2 tablespoons
  • Cayenne Pepper                                                        ½ teaspoon
  • Lime Zest                                                                    1 lime
  • Salt, Kosher                                                                1/8 teaspoon
  • Jumbo Shrimp, peeled, deveined, cleaned                 10 each
  • Corn Tortilla, soft                                                          6 each
  • Avocado, halved and sliced                                        1 each

Method of Preparation

  1. Gather all necessary equipment
  2. In a small bowl combine first four ingredients and mix well.
  3. Add shrimp and toss to evenly coat all shrimp.
  4. Cover and marinade in refrigerator for 30 minutes.
  5. Heat grill to medium high
  6. Either skewers your shrimp or use a grill basket to cook shrimp.
  7. Cook for 3-4 minutes per side. Shrimp should be opaque and cooked throughout.
  8. Remove shrimp from grill and cut up into large chunks or leave whole.
  9. On the cooler part of the grill add the soft corn tortilla shells.
  10. Grill until you see grill marks – about 3-4 minutes per side (this all depends on how hot your grill is, and how crispy you want them…at this stage they are still quite pliable).
  11. To assemble your tacos add 2-3 tablespoons of corn and black bean salsa on each grilled corn tortilla shell.
  12. Top with equal portions of diced or whole grilled shrimp and slices of avocado.
  13. Enjoy the extra salsa with some gluten-free corn tortilla chips.

Steamed Shrimp and Vegetables. A Le Creuset and EdgeWare Review & Giveaway!!

Updated 2/18/12 10:15 am – This giveaway is now closed.The two lucky winners have been chosen!! Congratulations to Marnely (Le Creuset Farm Fresh Steamer Set) and Karol (EdgeWare V-etched Zester). Please check your e-mails. Winners were chosen using random.org. I would like to again, thank Le Creuset and EdgeWare for sponsoring this giveaway. 

Over the last three and a half years I have had the opportunities to do many reviews of great products. I truly enjoy doing reviews of cookbooks, and gluten-free products, and I’m looking forward to do more in the future along with any culinary based items (kitchen appliances, tools, etc.).

I love kitchen gadgets. Here are a few of my “must-haves”  items: Chef Knife, Stand Mixer, Mixing Bowls (different sizes), Prep Bowls, Boning Knife, Steamer (pan/bamboo basket), Zester, Grater, Silicone Whisk, a good set of Non-Stick Pans, Cast Iron Skillet, and a Crock-Pot. There are plenty more items, however this is a great starting point.

Two of my favorite companies for kitchen products are EdgeWare and Le Creuset. I mean, don’t well all hope to own their products?? I was sent one of each of the following products to test out and review and I have to say, I am honestly in love with both of them. And, now two lucky winners will have a chance to win one of the following prizes (one winner for the Zester, and one for the Farm Fresh Steamer!)

First up we have a fantastic Zester from EdgeWare – The V-etched Better Zester! Here is what their website has to say about it:

New for 2012! The star of the new Edgeware V-etched line of graters is the Better Zester.This zester takes zesting to a new level with its innovative design and features. The V-etched Zester blade is made up of over 300 tiny V- shaped teeth and is covered with a non- stick coating. The food- approved coating allows the zester to smoothly glide across the surface of all types of citrus, while finely zesting the outer layer of skin and not the bitter pith. The Better Zester includes a “fresh zest” storage container with squeegee. This additional accessory gathers the fresh zest as it is grating and the squeegee helps remove the moist zest from the back of the blade. The ergonomically shaped kitchen tool features a non-slip tip and soft touch handle as well as a reusable protective cover. The Better Zester is available soon at specialty retailers nationwide in Stealth Charcoal Gray or Zesty lime Green.  Dishwasher Safe. Designed in the USA.

I’ve been using this almost daily since I received it…for zesting fruits, ginger, garlic, etc. I love the back of it where the container/measurer is, because it has the “squeegee” that works so well for getting all the little pieces. It is perfect for so many applications and a “must-have” in every kitchen.

Le Creuset Farm Fresh Steamer Set. This is a three (3) piece set that is a must have, especially when you are looking to make healthier cooking choices. I’m currently taking a Nutrition and Sensory Analysis course and our two main cooking methods are steaming and poaching – talk about a perfect time to review this huh? We are also trying to eat healthier this year by cutting out a lot of the “bad” foods and cooking methods and replacing them with “healthier” ones.

I’ve used this pan a few times, and it is wonderful. I’ve had another steamer for a while but was never a big fan of it. The Le Creuset one is a 3-quart steamer and its  base is constructed of tri-ply stainless steel and can be used separately to prepare sauces or side dishes.

For vegetables and seafood with maximum nutrients and the truest flavor and texture, steaming is the way to go. Le Creuset’s Farm Fresh Steamer Set, with its 3-quart base, fitted 2 3/4-quart steamer basket and tempered glass lid, offers a convenient and healthy option for meal preparation. Less water to heat means vegetables cook quickly, while maintaining their flavor, texture and nutritional value.

  • Steamer insert can be used with all Le Creuset stainless steel saucepans
  • Precision-pour rim allows for clean, convenient pouring directly from the pan
  • Tempered glass lid locks in moisture and heat while providing a clear view of food as it cooks
  • Brushed steel exterior prevents fingerprints
  • Dishwasher safe for easy cleaning

I also really loved the facts that it is dishwasher safe and the brushed steel prevents fingerprints.  I tested it out in the dish washer and it works great! Even with out the dishwasher it is still a very easy item to clean. This pan also has very even heating and you don’t need to use very high heat due to the material and design.

Below is a recipe I made one night to try both of these items out. We have been craving vegetables and lighter foods lately so I thought a simple dish of steamed shrimp and vegetables would be a great solution.  The cooking time was about 15 minutes!! Perfect for a weeknight meal that is also healthy and delicious.

Steamed Shrimp and Vegetables

Yield: 4

3/4 Pound Medium Shrimp (raw/cleaned and deveined)

2 Tablespoons light gluten-free soy sauce (San-J)

1 Tablespoon Toasted Sesame Oil

1/2 Teaspoon Chili Oil

1 Large Garlic Clove – grated

1/2 Inch piece of Ginger – grated

1/2 Teaspoon Brown Sugar

1 Teaspoon Rice Wine Vinegar

1 Large bunch of Bok Choy – Chopped

1/2 Cup Shredded Carrots

1/4 Cup Sliced Water Chestnuts

1/4 Cup Sliced Bamboo Shoots

1/2 Cup Snow Peas

Grate the ginger and garlic with the V-etched Better Zester. In a small bowl mix together the soy sauce, sesame oil, chili oil, garlic, ginger, sugar and vinegar. Add shrimp to a separate bowl and poor 1/3 of the mixture over the shrimp, toss to coat well and set aside.

Fill the Farm Fresh Steamer with about 1 1/2 quarts of water (or stock…slightly more flavor if you use stock with aromatics in them like crushed garlic and ginger pieces – this is what I normally do), and heat over medium-low heat.

Once the steam starts to build up in the pan, add the bok choy, water chestnuts, bamboo shoots and cook for 2-3 minutes (these take a little longer than the shrimp). Add the Shrimp, carrots, and snow peas, cover and cook for an additional 10 minutes or until shrimp is cooked throughout. Do not over cook the shrimp.

Toss with remaining sauce and serve over steamed rice. Top with a little chili paste if you like a bit more heat (we love spice so it is usually added).

Now for what you have all been waiting for…the giveaway!!

Two winners will be chosen – One (1) for the Le Creuset Farm Fresh Steamer Set and One (1) for the EdgeWare V-etched Better Zester.  Both of the products are awesome and I am very excited to be offering a giveaway. There are several ways to enter so be sure to do as many as possible to increase your chances. You must leave a separate comment for each entry. Giveaway is open to all who are residing in the contiguous United States.

  1. “Like” Le Creuset on Facebook (Mandatory)
  2. “Like” EdgeWare on Facebook (Mandatory)
  3. Follow Le Creuset on Twitter (Optional)
  4. Follow EdgeWare on Twitter (Optional)
  5. “Like” Creative Cooking Gluten Free on Facebook (Optional)
  6. Follow Creative Cooking Gluten Free on Twitter
  7. Leave a comment below saying what dish you would make first!
  8. Tweet about this giveaway “@LeCreuset Farm Fresh Steamer Set and @SmithsEdgeware Zester #Giveaway at @Creatively_GF http://wp.me/pnrJm-tv enter today! Pls RT”

Please leave a separate comment for each entry!

The giveaway ends on Friday February 17. Two winners (one for the Le Creuset Farm Fresh Steamer Set and one for the Edgeware V-etched Better Zester) will be chosen by using random.org. Winners will be notified by e-mail on Saturday February 18th and will have until noon on Tuesday February 21st to respond. If no response is received a new winner will be chosen.

I would like to thank Coaction Public Relations, EdgeWare, and Le Creuset for the opportunity to review these wonderful products and for offering this giveaway.

*This giveaway is sponsored by Coaction Public Relations, EdgeWare and Le Creuset. I was not paid for this review, and the opinions expressed in this post and my original review are completely my own.

Blackened Shrimp Nachos

Last weekend my Aunts Sue and Patti invited us over for dinner and some delicious gluten-free, crust-free cheesecake for my birthday. While we were there hanging out in the kitchen chatting with my Aunt Bryan and I started flipping through the Kraft Foods magazine “Food&Family” and Bryan kept picking out recipes he wanted me to make.  We do this often.  I’ll get a new magazine or cookbook and I’ll flip through it then give it to him to pick out what he wants to try first. So in this one, he picked out a few but the one he wanted first (aka, the next day!!) was the Cheddar-Shrimp Nachos.

They looked delicious in the picture, but I changed a few things around (go figure) to make them suitable for the both of us to enjoy but also I wasn’t a fan of some of the ingredients and wanted more of the others so I just played around with it and came up with the following interpretation of the dish.

This recipe is very easy to make, especially if you buy either the shelled, and cleaned raw shrimp or even more simple when you buy the pre-cooked (also shelled and cleaned) shrimp.  I made sure to remove the tails also because I didn’t want to have to deal with while eating nachos.

I also made my own blackened seasoning to suit our allergies.  So this is both gluten-free and onion free. I know this isn’t a traditional blackened seasoning but it worked extremely well for this dish. The recipe below makes more than you will need but I’ll be using this on chicken and fish in the near future.

Blackened Seasoning

1 heaping teaspoon hungarian paprika

2 Teaspoons kosher salt

1 heaping teaspoon garlic powder

1/2 heaping teaspoon cayenne pepper

1/2 teaspoon black pepper

Blackened Shrimp Nachos

2 Tbsp. KRAFT Zesty Italian Dressing, divided
1/2 lb.  frozen cooked cleaned medium shrimp, thawed or pre-cooked shrimp (cleaned) with tails removed
1/2 red pepper, diced (1/4 inch)
1 Tbsp.  blackened seasoning (see recipe above)
1/2 – 1 cup  shredded cheddar cheese (we liked the “mexican” blend)
1 jalapeño pepper, thinly sliced (or you can substitute jarred jalapenos if you can’t find fresh ones)
2 Tbsp.  chopped fresh cilantro
1/2 cup chopped mixed greens
Gluten-free Tortilla chips

HEAT large skillet on high heat until it is very hot and starts to smoke. Add 1 Tbsp. dressing, red peppers and seasoning; cook and stir 1 to 2 min. or until the pepper has a “roasted” look to it. Add the shrimp is heated through and evenly coated with dressing mixture. Stir in remaining dressing.

Heat oven to 375 degrees and arrange tortilla chips on a baking sheet. Layer the shrimp and pepper mixture and cheese.  Add a second layer of shrimp and add remaining shrimp and cheese.  Top with jalapenos.

Bake for 10 minutes or until the cheese has melted.  Remove from oven and top with cilantro and chopped mixed greens.

Serve with fresh tomato salsa and a little bit of guacamole – enjoy!

I think I need to add a subscription to this magazine on my wish list.

Light and Delicious

Last month I planted out little container garden (thankfully we choose a place with a deck!).  With all the heavy rains we’ve been having around here I wasn’t sure if some of the seeds would ever produce anything.  Thankfully everything is on its way to becoming some delicious goodies.  We planted Thai chili peppers, habaneros, pepperoncini, carrots, cucumbers, snap peas, super sweet tomatoes, yellow pear tomatoes, radish, zucchini, basil and lettuce.  I took this picture this morning:

My last few recipe posts have been pretty “heavy” foods, so today while I was making dinner I thought I should probably post this one.  It is quick, easy, light and delicious and believe it or not budget friendly (see below the recipe for more information).  A perfect meal for this kind of weather.  I love when spring and summer comes around because this means more fresh ingredients available and I don’t know if it is just me but I don’t crave those heavy meals much.  I love salads and more veggie based meals during this time of year and I plan to be posting more recipes like this soon. To kick off my lighter recipes (this may not be a daily thing but I will get better about posting more recipes like this), I decided to make some gluten-free pasta (We mostly eat Sam Mill’s or Goldbaum’s gluten-free pastas, we find that to use these are the two that have a very similar taste and texture to “regular” pasta) with pesto, diced zucchini and for a little treat some sautéed shrimp. My basil hasn’t grown enough for me to make homemade pesto so for now we have been using the Classico Pesto – which is gluten-free! and delicious.  While at the grocery store today I found some pretty decent sized zucchini and summer squash and thankfully shrimp was on sale so we picked up a few to toss in and add a bit of protein to our meal.  Of course Bryan made us a salad with mixed greens and cucumbers with some homemade balsamic dressing.

This meal is delicious with our with out the shrimp, however we never splurge on shrimp but we are pretty sick of chicken and red meat right now and wanted to mix it up a little bit.  You could always add some grilled chicken on top also or if you wish to add more veggies mix in some halved grape tomatoes, diced summer squash or blanched/grilled asparagus.

Pesto Pasta with Shrimp and Zucchini (serves 2)

1/2 Pound gluten-free pasta of your choice, I prefer penne,  fusillior gemelli because I think it holds the pesto better)

1 Large zucchini diced into 1/2 – 1 inch pieces

1/4 Pound of Shrimp (cleaned, deveined and tails still on)

1/4 Cup pesto – more if you prefer

2 Tablespoons of olive oil, divided

Sea Salt and Pepper

In a medium saucepan bring water with salt and a tablespoon of olive oil to boil for pasta and cook according to the package instructions.

Season the shrimp on both sides with sea salt and pepper.

Heat one tablespoon in a non-stick sautée pan over medium heat. When there is about 5 minutes left on the pasta add the shrimp to the sautée pan. Cook for about two minutes on each side (until shrimp is opaque in the center)

When there are four minutes left on the pasta cooking time add the diced zucchini.

Strain the pasta and zucchini but do not rinse the pasta in cold water.  Return the pasta to the pan, add the prepared pesto and shrimp.  Toss until well mixed (if you are adding in the halved tomatoes add them in now and toss again).  Add more pesto if you wish, serve with a side salad.

This meal is very versatile – add shrimp, chicken, veggies – whatever your heart desires.

Recipe cost break down:

Seeing as I just finished up my Menu Planning and Cost Control course I thought I would break down how inexpensive this meal was to make: the total recipe cost was $5.34 which means only $2.67 per portion!! Now can you imagine if you were to order this while eating out you would be paying around $12 – $14 for this dish that really only costs $2.67 per portion including shrimp.

Garlic-Basil Shrimp

This super simple recipe has become one of my favorites (and Bryan’s too I think).  Its from the “So Easy” cookbook by Ellie Krieger.  You really have to give this a try and best part, the original recipe almost 100% naturally gluten free.  The only substitution I have to make is instead of orzo pasta, I use either white or brown rice

Garlic-Basil Shrimp by Ellie Krieger

2 tablespoons olive oil

1 1/4 pounds shrimp (20-25 per pound), peeled and deveined (I used tail on frozen shrimp)

3 garlic cloves, minced

1/8 teaspoon crushed red pepper flakes or more to taste

3/4 cup dry white wine

1 1/2 cups grape tomatoes, halved

1/4 cup finely chopped basil

salt and freshly grounded black pepper, to taste

3 cups of brown or white rice (original recipe calls for whole wheat orzo pasta)

Heat the oil in a large heavy skillet over medium-high heat until hot but not smoking, then add the shrimp and cook, turning over once, until just cooked through, about 2 minutes.  Transfer with a slotted spoon to a large bowl.

Add the garlic and red pepper flakes to the oil remaining in the skillet and cook until fragrant, about 30 seconds.  Add the wine and cook over high heat stirring occasionally, for 3 minutes.  Stir in the tomatoes and basil and season the sauce with salt and pepper.  Return the shrimp to the pan and cook just until heated through.  Serve with rice (or orzo).

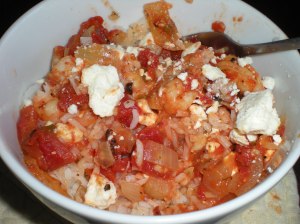
Baked Shrimp with Tomatoes and Feta

dscn1713

Baked Shrimp with Tomatoes and Feta

(adapted from Eating Smart w/ Ellie Krieger)

1 tablespoon olive oil

1 medium onion, diced (about 1 1/2 cups)

2 cloves garlic, minced

Two 14.5-ounce cans of Trader Joe’s Fire Roasted Diced Tomatoes with Green Chillies*

1/4 Cup finely minced fresh flat-leaf parsley

1 tablespoon finely minced dill

1 1/4 pounds froze and thawed medium shrimp peeled and deveined

1/4 teaspoon salt plus more to taste

1/4 teaspoon freshly ground black pepper, plus more to taste

2/3 cup crumbled feta cheese

Preheat oven to 425 degrees

Heat oil in an ovenproof skillet over medium-high heat.  Add the onion and cook, stirring until softened, about 3 minutes.  Add the garlic and cook for 1 minute.  Add the tomatoes and bring to a boil.  reduce the heat to medium-low and let simmer for about 5 minutes until the tomato juices thicken.

Remove from the heat.  Stir in the parsley, dill and shrimp and season with salt and pepper.  Sprinkle the feta over the top.  Bake until the shrimp are cooked through and the cheese melts, about 12 minutes.

Serve over rice.

*The original recipe calls for two 14.5-ounce cans of no-salt-added diced tomatoes.  For a spicy version use two Trader Joe’s Fire Roasted Diced Tomatoes.  If you do not like a lot of heat use one can of the TJ’s and one of the no-salt-added.

Sesame Orange Shrimp

gf1475

Sesame Orange Shrimp

(Adapted from Martha Stewart’s Every Day Food, #13 page 76)

2 large egg whites

1/4 cup cornstarch

1/4 cup sesame seeds

coarse salt and ground pepper

1 1/2 pounds medium shrimp, peeled and deveined

1/4 cup vegetable oil, plus more if needed

1 cup fresh orange juice

2 tablespoons soy sauce (gluten free)

1 tablespoon sugar

4 scallions, trimmed and thinly sliced

Steamed white rice

~In a large blow, whisk together egg whites, cornstarch, sesame seeds, 1 teaspoon salt and 1/2 teaspoon pepper until frothy. Add shrimp and toss to coat.

~Heat 1/4 cup oil in a large nonstick skillet over medium-high heat. Working in two or three batches, cook shrimp until golden and crisp, 2-3 minutes per side; transfer to a paper-towel-lined plate to drain. Add more oil to skillet if necessary for remaining batches.

~Wipe skillet with a paper towel. Add orange juice, soy sauce and sugar; boil over high heat until syrupy and reduced to about 1/3 cup, 4-5 minutes. Return shrimp to skillet; add scallions and cook until heated through and coated with sauce, about 1 minute.

~Serve over steamed white rice.