
Happy Celiac Awareness Month!! (CAM) I’ve been writing Creative Cooking Gluten Free for 8 years as of next month, I can’t even believe it has been that long since I was diagnosed. I was 26… More

Happy Celiac Awareness Month!! (CAM) I’ve been writing Creative Cooking Gluten Free for 8 years as of next month, I can’t even believe it has been that long since I was diagnosed. I was 26… More

Brigadeiro – Brazil’s national dessert, a truffle which you will find at all of the major Brazilian celebrations. tinyB chocolates are hand made in San Francisco at a family-owned artisanal company. The owners of tinyB… More

Have you heard of Gluten Free Things before? I hadn’t until I was contacted by the owner asking if I would like to sample their products and write about my experience with them. I looked… More


Elizabeth Barbone (Gluten Free Baking) has done it again, this time with her latest cookbook “The World’s Easiest Paleo Baking” which is loaded with recipes that are gluten-free, grain-free, dairy-free, and no refined sugars!
I had the pleasure of meeting Elizabeth a few years ago at the Gluten-Free & Allergen Friendly Expo in Secaucus, NJ. She is simply amazing, funny, and beyond talented. When this latest book was released (January 2016), she asked if I would like to be part of the “bake around” for it along with a handful of other bloggers, of course my answer was YES! I am not paleo (however some of my recipes just happen to be paleo), I do have celiac disease and a dairy allergy so these recipes are perfect for me and anything to support Elizabeth.

The recipe we were asked to make and share with all of our readers is accurately named “World’s Easiest Cookies”, I kid you not, these are the world’s easiest cookies…except for those that you buy in a package, but why would you do that when you can make these?? They are delicious to top it off. Light and fluffy bites of goodness. I made the batch and Bryan proceeded to eat more than half of them. I was lucky enough to grab a few for myself.
Elizabeth is kindly letting us share this recipe with all of you and is also giving away 5 copies of her new book. So check out the recipe below and be sure to enter Elizabeth’s giveaway here: GIVEAWAY

Active Time: 5 minutes
Bake Time: 12 minutes per pan
Yield: 16 cookies
170 grams (1 1/2 cups) finely ground almond flour
1/2 teaspoon baking powder, homemade (see recipe below) or grain-free
store-bought
100 grams (1/3 cup) dark maple syrup
2 teaspoons vanilla extract
Adjust an oven rack to the middle position and preheat the oven to 350
degrees F. Line a rimmed baking sheet with parchment paper.
Whisk the almond flour and baking powder together in a medium mixing
bowl. Switch to a wooden spoon and stir in the maple syrup and vanilla
extract. Stir until a sticky dough holds together.
Drop dough by the tablespoonful onto the prepared baking sheet, spaced
about 2 inches apart. For crisp cookies, press down the dough lightly
with the at bottom of a drinking glass or measuring cup. (If the glass
sticks to the dough, lightly wet bottom of the glass.) For softer
cookies, don’t press down the dough.
Bake until the edges are golden brown, about 12 minutes.
Allow the cookies to cool on the pan for about 3 minutes, then
transfer them to a wire rack to cool completely.
Allow the baking sheet to cool, and repeat with the remaining dough.
Grain-Free Baking Powder
Most commercial baking powders contain a grain-based starch.
Thankfully it’s easy to make your own!
Active Time: 2 minutes
Yield: about 6 tablespoons
1/4 cup cream of tartar
2 tablespoons baking soda
1 teaspoon tapioca starch
Whisk the cream of tartar, baking soda, and tapioca starch together in
a small bowl.
Store in the pantry in an airtight container for up to 4 weeks.
See how easy these cookies are? And did I mention DELICIOUS?!? Be sure to check out all the bake around posts on Elizabeth’s website; Gluten Free Baking


Looking to try a meal delivery service, but need it to be 100% gluten-free? We FINALLY have an answer…Diced.
Diced was created by Tinsley Meloy’s who was diagnosed in 2008 with Celia Disease. She, like myself and many others out there had to learn to how cook and survive in a whole new world; the gluten-free world. Diced was created out of her desire to create a successful, gluten-free lifestyle to make the gluten-free world easier to navigate and tastier to eat.
Diced is based out of Brooklyn, NY and everything is prepared in a 100% gluten-free facility so there is no need to worry about cross-contamination! Amen! Seriously, knowing that was a huge thing for me as I have noticed recently that I’ve been getting ill after even the smallest amount of cross-contamination.
Here is how it works: Visit MyDiced.com and check out their Weekly and Core menu options. Choose your meal(s) –> trust me you’ll want to order more than one! Then click the checkout button when you are ready to purchase. Meals are delivered next day (Monday-Friday)!
Tinsley and the awesome team over at Diced kindly provided us with three meals (of our choice) to sample. I can’t even begin to express how excited I was to try this service. We’ve talked about trying other services in the past however none were 100% gluten-free and didn’t want to risk it. Bryan and I went through the list and picked the Takeout Style Chicken and Broccoli with Rice, Quinoa Chili, and Salmon Nicoise Salad. Bryan doesn’t normally eat cooked fish (he’s much more of a sushi guy, so the last one was really for me), however he loved it! All of the meals were beyond easy to make…they come with recipe cards with pictures for you to follow. Everything is pre-measured out and neatly packaged. These meals are perfect for those that are in need for a quick and easy dinner on busy nights. I normally plan out a weekly menu, so this took some of the guess work out of it for me. I will 100% be purchasing meals from Diced again.
Tinsley and team is offering Creative Cooking Gluten Free readers a special discount…use DICED<3sCCGF at checkout to receiving 25% off your order!!
Be sure to check Diced out on social media as well: Facebook, Twitter, Instagram And don’t forget to check out my posts and reviews on Instagram too! Use #getdiced
I tried my best to take pictures of each of the meals, but completely spaced for the quinoa chili and just inhaled it before any pictures were taken; sorry about that! Below are images from the other two meals we chose though!


*A coupon code for free meals was provided by Diced – all comments and opinions are 100% my own.

Earlier this month was the Gluten Free & Allergen Friendly Expo in Secaucus, NJ. It was an honor to be part of the blogging team again this year and to spend the weekend with so many passionate advocates for the gluten-free community. Below are photos from the GFAF Expo which feature some of my favorite brands, products, and highlights (put your cursor over the photo to read more!).
If you haven’t attended one of these expos just yet, check out the GFAF Expo site to see if one is coming to your area. It is such an amazing opportunity to safely enjoy samples from companies and learn about new products and companies that suit your dietary needs.
Thank you for allowing me to be part of this again, looking forward to next year!


![]()
As one of the official bloggers for the upcoming Gluten Free & Allergy Friendly Expo in Secaucs, NJ next month, the lovely group of individuals behind the Gluten Free Media Group have kindly sent me a box from their Send Me Gluten Free mail subscription to review and share with all of you, plus one of you will get to win a box as well!
The Send Me Gluten Free monthly subscription boxes are loaded with tons of great gluten-free products and coupons! Every month, subscribers will get to try between 8-12 new gluten free products (some are full size and others are sample sized, but all are awesome). Items in the box consist of food, personal care items, supplements, and household products that support a gluten free lifestyle. The Send Me Gluten Free subscription boxes are perfect for
I love these boxes – however the September one was a bit limited for myself (Celiac and Dairy Allergy) so Bryan lucked out and got most of the box for himself (he didn’t complain at all!). Below is a picture of what came in this month’s box…loads of awesome stuff:
 My September box featured: One bag of Free for All Kitchen’s Double Chocolate Gluten Free Brownie Thins, two packs of Massel 7’s Vegetable Bouillon, Cubes, two 2 Degrees Chocolate Bananan Mini Snack Bar (100 calories), one Bag of Barbecue ips chips with protein, one Bags of Biena Chickpea Snacks- Cinnamon Crunch, one Bag of Cheddar Qwakers- gluten free crackers (let me just rave about these for a quick second, when I could eat dairy, these became my favorite little treat…soooooooooo good and I miss them dearly), and 3 Sample Packs of Kimmie Candy Company’s products, including Salted Caramel Chocorocks, Sunbursts, and Chocorocks (nut free). Like I said, lots of awesome stuff in this box.
You can subscribe by doing Month-to-Month, 3 Month, 6 Month, or 12 Months at a time!

Have you tried Send Me Gluten Free yet? Do you want to? Read below for how to enter and if you do not win the giveaway, you can still receive 20% off by using the code BLOG20 boxes are currently shipped to the continental US only (hope to expand soon!) and we CAN ship to PO boxes if needed!
Giveaway ends on Wednesday September 30th at 11:59 pm, winner will be chosen by random and will have 48 hours to respond (Winner will receive the November box!).
How to enter :
Leave a comment on this post or on my giveaway post on Instagram (@CreativeCookingGF) telling me why you want to win the Send Me Gluten Free (one month) subscription box…do you have celiac disease? Newly Diagnosed? Wanting to share with a friend/family member? Want to try new items?
*This is a sponsored post, I was sent the September box to review – all comments and opinions are 100% my own.

 It’s that time of year again…the Gluten-Free and Allergen Friendly Expo is coming back to Secacus, NJ. I am excited to be invited back as one of the Official Bloggers for the event. Being an official blogger allows me to attend the event (for free), tweet/post/and share all of the awesome products and companies, but it also gives me the opportunity to give some lucky readers a FREE TICKET to one day of the expo. The expo is October 3-4th this year and I hope to see you all there! Entry will be easy, but there are a few things I want to share about the expo before we get to the giveaway part so keep reading.
Not familiar with the Gluten-Free and Allergy Friendly Expo? Learn more by visiting their website, facebook, twitter, and instagram pages and be sure to follow me on faceook, twitter, and instagram to get live posts from the event!
Here is what you get when you come to the GFAF Expo:
 This is the third year that the GFAF Expo will be at the Meadowlands in Secacus, NJ and this is my third year attending as official blogger. Below are some of the shots from last year. I promise you, you do not want to miss this! Its fun, the people are great, you get to try many of your favorite products and even try some new items that haven’t hit the shelves just yet. Its a celiac’s (gluten intolerant) dream.


11:00-12:00 Jenna Drew
“Essential Oils for Digestive Wellness” Join a fellow Celiac to discover the six most effective essential oils to support digestive wellness and boost immunity – and how to use them!
12:30-1:30 Silvana Nardone
“I’m Gluten-Free, But I Still Don’t Feel Great. Now, What?!” After cooking—and baking—gluten-free for her son, Isaiah, since his diagnosis eight years ago and writing her best-selling cookbooks, Cooking for Isaiah and Silvana’s Gluten-Free and Dairy-Free Kitchen, Silvana received email after email from readers who even after going gluten-free were still tired and bloated. Other readers couldn’t eat rice or potato. She decided it was time to get back in the kitchen and experiment. Her new mission? To develop a grain-free flour blend and mixes that could deliver great texture and flavor—just like her wildly popular gluten-free flour blend. Silvana will share her insanely addictive grain-free, refined sugar-free chocolate chip cookies along with revealing the powerful health benefits of eating both gluten-free and grain-free.
2:00-3:00 Jen Cafferty
“Gluten Free 101: Get All Your Questions Answered” If you have been gluten free for less than a year, this is the class for you! You will learn all the tips and tricks to having a successful gluten free and allergen friendly life.
“Gluten Related Disorders” Discussion of celiac disease as well as the newly emerging entity of non-celiac gluten sensitivity. What causes these conditions and management issues.
12:30-1:30 Amy Fothergill
“Gluten-Free Pastas and Sauces” If you think making fresh gluten-free pasta or creamy dairy-free sauces is impossible, think again. Amy Fothergill, author of The Warm Kitchen gluten-free cookbook, will share her best tips and tricks for cooking perfect gluten-free pasta. She will provide recipes to teach you how to make gluten-free pasta and gnocchi. She will also discuss how to make super simple and delicious sauces. It will all be “molto bene” (very good)!
2:00-3:00 Carol Kicinski
“Learn how to successfully live gluten free wherever you are!” Carol Kicinski, founder of Simply Gluten Free, will share her tips and tricks to living gluten free at home, on the road, out to dinner and at parties with friends.
 As I mentioned above, I will be giving away tickets to three lucky readers – tickets are good for ONE day only of the expo.To enter the giveaway please leave a SEPARATE comment for each item you complete below. Giveaway will end on Wednesday September 13th – each winner will be selected using random.org and will be notified via e-mail. Winners will have 48 hrs to respond and will be sent an online code to claim their tickets (each code can only be used one time!).
GIVEAWAY
If you are not one of the lucky winners we can still help you get there by offering you 20% off your tickets simply use this click on the image below and enter the promo code: ADVANCE

About a month ago I heard about this new company called SmartyPans and was rather intrigued by their concept so I reached out to Prachi Baxi, CEO of SmartyPans for a bit more information and here is what she had to say, “our goal is to help people cook better and also give them the ability to track caloric intake. SmartyPans app will thus work as a sophisticated form of food-diary for the Nutritionists: it will be the platform for Nutritionists and other health professionals to track and understand the precise nutritional intake of their clients and thus guide/counsel them in an effective way.” So you may be asking how is this information tracked? Well it is tracked via an app on your phone or tablet.

Earlier this year Prachi and her brother Rahul were interviewed at SXSW by The Washington Post and according to Prachi “SmartyPans is a smart cooking pan that connects to a free recipe app and gives you step-by-step cooking instructions. The cool thing is, the pan will warn you if you need to adjust the temperature, and it will show you caloric information in real-time on the tablet screen, using bluetooth connectivity sensors built into the pan. So, you always know exactly what went into your food and what your nutritional intake was. At the touch of a button, you can then input that information into other nutritional fitness platforms like MyFitnessPal or Fitbit. No more guestimating.”
I love the idea of this and can’t help but think of the people who could benefit from it. It takes the fear out of cooking for some people, and that is one of the biggest hurdles I have seen for people who want to be healthy but don’t know how to cook for themselves.
Check out this video to see it in action:
Check out their website for more information, updates and how to pre-order your pan now.

Nicole Hunn of Gluten Free on a Shoestring is one of my favorite gluten-free cookbook authors and bloggers. The woman is a genius when it comes to taking your favorite gluten-filled recipes and reformulating them to be gluten-free and she hit the nail on the head again in her latest cookbook, Gluten Free Classic Snacks. With 100 recipes (YES 100!) for everything from cookies, brownies, snack cakes, and pies to buttery crackers, cheese crackers, pretzel rods, candy bars, and licorice–along with helpful tips and tricks for easy prep, extensive information on ingredients and substitutions, and basic recipes for homemade flour blends– Gluten-Free Classic Snacks will help you to bring back all the flavors and fun of the treats you remember. In the last two months I have had to change my diet a bit and am now not only gluten-free but also dairy free. I was please to see that Nicole included easy substitutions for her recipes. I made one recipe from the cookbook without any substitutions and had other try it out…the response DELICIOUS and then we tried a few others with substitutions and again the response was DELICIOUS. Bryan has a handful of his own food intolerance including quite a few FODMAP’s, OAS, and a wheat intolerance. I had him go through this cookbook (like I do with many that I receive in the mail) and had him mark which recipes he wanted to try first…I would say that more than 80% of the book was marked. To me that is always a good sign. I was given a list of recipes to choose from to review and without any hesitation we decided on the Kellog’s frosted strawberry pop-tarts toaster pastries. Probably one of the best decisions we’ve made recently (at least food wise). They were delicious! The only ingredient I didn’t have was gluten-free sprinkles. I can’t wait to make these again, and a bunch of the other recipes in the book. I have a lot of baking to do in the near future and I am okay with that.


Prep time: 1 hour 40 minutes Cook time: 10 minutes Total time: 1 hour 50 minutes
Author: Nicole Hunn from Gluten-Free Classic Snacks Serves: 12
Ingredients
For the crust:
For the filling:
For the glaze:
Instructions
 From Gluten-Free Classic Snacks by Nicole Hunn. Reprinted with permission from Da Capo Lifelong, 2015
In addition to being able to share this recipe with all of you I am also giving away THREE copies of this incredible cookbook – get ready for some childhood food memories to come rushing back. Please read the giveaway instructions carefully! Giveaway is open to both residents of the United States and Canada!! How to enter – please leave a separate comment below for each entry! There is one mandatory post and all others are optional! Giveaway ends on Friday July 24th. Winners will be chosen using random.org and will have 48 hours to respond, if no response is received a new winner will be chosen. Good luck to all who enter!

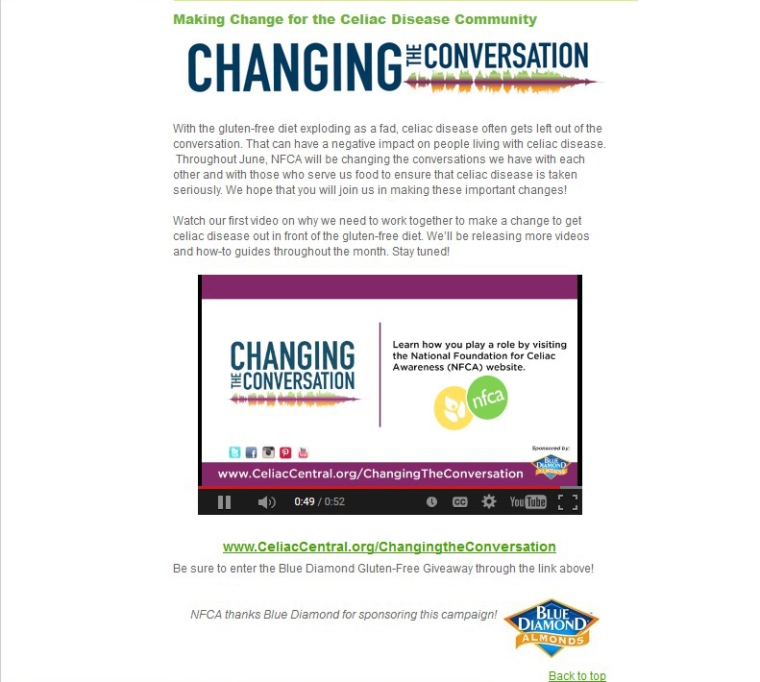
 We have all heard it a million times now…the gluten-free diet is considered a “fad diet” and little of the conversations and media reports actually include the real reason behind a gluten-free diet…CELIAC DISEASE. Not only does this frustrate those with celiac disease when we try to bring the conversation but it also leaves a negative impact on those that are actually living with the disease and and the severity of it. This is not a dietary choice, there is no cheating, this is necessity, it is our ONLY treatment, and it needs to be taken seriously.
During the month of June the NFCA is helping to change the conversation to what it should be about…celiac disease! Check out their first video HERE (or click the image below). Keep checking back from more information and videos throughout the month of June. Please share and be part of the change!
 Don’t forget to check out National Foundation For Celiac Awareness on these social media sites:

I apologize now for an extremely long post but I wanted to make sure I covered all my bases for this round-up including spreading awareness to current and future dietitians, PSA from National Foundation for Celiac Awareness, and new gluten-free products.
For the last several years I have celebrated Celiac Awareness Month and raising awareness of Celiac Disease by hosting giveaways on this site. This year however, I wanted to do something different. While giveaways are awesome, fun, and it gets people involved I wanted to focus more on the awareness aspect of this month and help educate those around me. As many of you know I am currently pursuing my dream of becoming a Registered Dietitian and am honored to be completing my internship at NewYork-Presbyterian. In case you didn’t know, NYP is one of top six hospitals in the country and number one in New York. NYP is connected to two incredible medical colleges; Columbia University and Cornell University. Columbia is also home of one of the best Celiac Research Centers in this country, Celiac Disease Center at Columbia University. While my awareness event has no direct connection to the center, it is amazing to be in connection with them through the hospital.
I debated on offering giveaways for quite a while leading up to this month and finally decided that I think it would be more beneficial to spread awareness and knowledge to those around me…current and future dietitians. When I was diagnosed, I didn’t have a dietitian available to me and my doctor wasn’t the most knowledgeable in the area of celiac – she saw my results, said what I had, and said no more pasta or bread. That was all. Everything I learned, I learned on my own by way of Google, books, and some amazing bloggers out there. They were the ones that kick started my desire to start Creative Cooking Gluten Free and then to pursue the filed of Dietetics. I wanted to help people understand they can have these items, just more creatively. I also have the desire to help not only those with celiac but with other gastrointestinal disorders, food allergies, etc. I love the challenge of creating meal plans and recipes for those with multiple food allergies. My degrees in Culinary Arts and Culinary Nutrition go hand in hand with my studies in Dietetics…you can’t have one with out the other (at least that is my philosophy). I wanted to share with those pursing this field and also have a desire and passion for helping people gluten-free resources including educational materials and samples for them to try and be able to give a 100% honest feed back to a patient when they ask “do you have any suggestions on products?” “what is the best gluten-free…on the market”. We need to know these things because despite what some say, celiac disease is real, not a fad, and not going away.
Each month in our internship we have a Class Day, where all 32 of the interns come together and we have various sessions on topics in dietetics. May being celiac awareness month was the perfect month for me to share with this captive audience. I reached out to about 50 gluten-free companies, explaining what I wanted to do and who my targeted audience was, and asked if they would be willing to send some samples to be included in the “swag bags” that would be given to the current and future dietitians. Several responded that they had received too many requests, which is no surprise being that it was celiac awareness month, however the responses I received were overwhelmingly generous! I received samples, full sized products, educational materials, coupons, and more. This celiac community and their desire to help educate and raise awareness continually blow me away.
I recruited some help from a few of the other interns to help me put the “swag bags” together – we made a total of fifty to share with the current interns, our directors, and current dietitians at the hospital. The response was overwhelmingly positive and many great conversations were started because of this.

(Celiac Awareness Month Swag Bags – ready to be handed out to current and future RD’s)
 (NYP’s 90th & 91st Class of Dietetic Interns)
Thank you to all who helped make this event possible – I couldn’t have done this with out you and your extreme generosity.


Check out these mail deliveries I received! I seriously couldn’t even sleep in my room after the last shipment arrived.


It is always a pleasure to work with all of you on my blog over these last several years and I love that I have had the privilege to meet many of you at the last two Gluten Free and Allergy Free Expos in Secaucus, NJ. Looking forward to working with all of you again, and hopefully seeing you soon. Without you, none of this is possible!
Celiac Disease is serious…seriously it is! It is an Autoimmune Disease, not just a diet. It is not a fad diet created by Hollywood to make you lose weight. The gluten-free diet is the ONLY treatment for those with Celiac Disease. There is not cure. There is no magic pill to take. This is real life.
Do you have celiac disease and trying to figure out how to talk to your family members about being tested? Head on over to the National Foundation for Celiac Awareness’ site for important information, tips, and talking points and watch their PSA called Seriously, Celiac Disease HERE.

Here are some new gluten-free items worth checking out:
New from I Heart Keenwah: Quinoa Puffs (featured below, Aged Cheddar and Sweet Chili) – delicious little bits of goodness and loaded with 5 grams of protein per serving.

Snyder’s of Berlin: Variety of Gluten-Free Chips – great for all the summer BBQ’s that are coming up.


Walkers – Gluten Free Shortbread Cookies. I remember this brand of shortbread cookies from when I was little. Learning a few months ago that they had come out with a gluten-free line of them, I was rather excited as it brought back some childhood memories of a hot cup of tea and shortbread cookies with my grandmother. The gluten-free line comes in three flavors: Chocolate Chip, Ginger & Lemon (sounds amazing to me!), and Pure Butter (below).

Luna & Clif Bars – in case you missed it ALL Luna bars are now Gluten-Free!! Check out the new offerings from both companies below…the dark chocolate almond from Clif is so delicious and perfectly fits in my lab coat pocket!


 Bone broth has become very popular – you can even sign up for weekly or monthly deliveries in some places. It has been around for a very long time, often the base for soups in many cultures, and is making a come back. Most people use broth (regular or bone) and stock interchangeably as they are all are made with similar ingredients and cooking method: simmer water, meat or bones (or both meat and bones), seasonings (herbs) and sometimes vegetables (carrots, onions). Once the broth, stock, or bone broth has simmered long enough, the solids (meat, bones, vegetables, etc.) are then removed by straining (typically done with a fine mesh sieve), leaving behind nutrient rich liquid. However, there is quite a difference between the three.
Now let’s break down the differences…
Broth: is usually made with meat and has a small amount of bones in it (whole chicken for example). The simmering time for broth is the shortest of the three, typically its anywhere between 45 minutes – 2 hours and the end result is usually light in flavor, thin, but a good source of protein.
Stock: can be made by either roasting the bones (usually has some meat one them, but not a lot), or not roasting them first, however roasting the bones creates more depth of flavor in the finished product. The simmering time for stock is longer than broth, typically between 3-5 hours. Due to the longer simmer time stock is richer in both minerals and gelatin and also a good source of protein.
Bone Broth: the bones used to make bone broth have the least amount of meat on them. Again, roasting the bones first brings out more flavor for the finished product. The simmer time for bone broth is much longer than that of broth or stock; typically the bones simmer for 24+ hours! Why so long? The extensive simmer time helps to remove as much of the minerals and nutrients that you can get from the bones (calcium, magnesium, phosphorus, gelatin, collagen, etc.). Bone broth is a bit thicker than regular broth and has the highest source of protein…the Pacific Naturals that I use has 9gm per 8oz.
All of these are easy and affordable to make at home – make a big batch and freeze it in quart containers, which can easily be defrosted and used in recipes later on. If you don’t have the ability to make it at home (like myself right now), there are some delicious pre-packaged ones on the market. Pacific Naturals is my favorite…its organic, delicious, affordable, and very convenient.

With bone broth being so rich in nutrients and gelatin, it is often drank warm…especially during cold and flu season. Bone broth can be also used in numerous culinary applications. I used it recently to make a batch of spicy chicken soup when I was feeling under the weather. When I just want to drink a cup of it, I heat up one of the 8oz package of Pacific Naturals Bone Broth Chicken with either lemongrass or ginger – delicious!
Spicy chicken soup with Thai Chili Peppers
 Ingredients
Method of Preparation
*organic


It’s a new year which means 37 Cooks is back in action! Even though the past few months have been extremely busy with moving to NYC and starting my Dietetic Internship I have missed these fun recipe challenges, and I am happy that this first event is sponsored by one of my favorite brands, Bilinski’s.
If you aren’t familiar with Biliniski’s they are a family owned and operated company that specializes in chicken sausages (with no pork casings!) since 1929. Their products are made from every day ingredients, gluten-free, preservative-free, antibiotic-free, nitrate and nitrite free, all meat is raised in clean, comfortable conditions, no animal by-products in their feeds, and no hormones…but are full of flavor! These sausages are fully cooked and are also low in fat, so you need to be careful to not over cook them.
I wanted to create a healthy and hearty dish that incorporated ingredients that would compliment the flavors in the new Kale Balsamic chicken sausage! Since moving here and not having an income I have tried to stretch my food dollar even further than before. One way I’ve found to do this is to create dishes that incorporate a lot of delicious and healthy ingredients that are filling and re-heat well…you could serve this dish to a family of four or if you are in a similar situation as myself, have leftovers for a few days (I promise it re-heats very well). Feel free to change-up the ingredients as you see fit. The Kale Balsamic Sausage and all vegetables used in my recipe were organic (I have strangely found that the organic items are cheaper than non-organic in the stores around me).
I know many of you are looking for healthier recipes to get this year started. Sometimes the word “healthy” is translated into “unsatisfying” or “bland”, but it doesn’t have to! Healthy can be (and should be) delicious, flavorful, hearty, filling, and all those other good things that you are craving. Try using a new ingredient each week to expand your horizons in the “healthy” department: try millet instead of rice one week. Using seasonal vegetables and fruits in dishes also means additional flavor.


Warm Millet Salad with Kale Balsamic Chicken Sausage
Ingredients
Method of Preparation
 Thank you to the awesome folks over at Bilinski’s for sharing this new product with all of us at 37 Cooks! This post is sponsored, however the recipe and opinions are 100% my own.
Want more information on Bilinski’s? Find them here:


I know that this is by no means traditional Phở, but instead think of it as a tasty interpretation of traditional Phở.
Phở is a Vietnamese noodle soup that has linguine like rice noodles, fresh herbs, a delicious broth and meat (typically beef or chicken…I prefer beef). Given my current situation of lets face it being extremely poor, there was no way that I could go out and buy all the ingredients to make the broth from scratch (it is on my list to do at some point though), so I used a Phở “starter” broth…it was a concentrated liquid broth that you add water to from Savory Choice. Pacific Naturals also has several Phở to choose from (which are delicious, if you haven’t tried them yet, you should).

I started off by sauteing some fresh ginger, garlic, and turmeric in a large pot, then adding a whole bunch of vegetables, the liquid broth, and water, brought it to a simmer and let it hang out for a while. I was going to leave it just like that but remembered that in my little freezer I had a small piece (about 3 oz) of hanger steak. I defrosted that and quickly marinated it in some 50% less Sodium Tamari from San-J and about a tablespoon of chili paste. This turned out so delicious especially with the added Thai chili peppers and chili paste. You can add whatever vegetables or meat you wish. I would have added some cilantro, green onions, and bean sprouts if I had them.

Ingredients
Toppings (optional):
Method of Preparation
This recipe is gluten-free and dairy free and can easily be made vegetarian!


Foster Farms, the producer of the nation’s number one selling corn dog product who has been in the chicken business since 1939 has released a certified gluten-free option! Yes, I said certified gluten-free (by the Gluten Intolerance Group/GIG). Their new gluten-free corn dog is made with a chicken hot dog that is dipped twice in a honey corn breading that has a delicious flavor and crunch. They come in boxes of 12 and make a great snack meal for you and your little ones. These would also be perfect for Super Bowl Sunday! My favorite way to enjoy them is baked in the oven (you can also cook them in the microwave, but the crunch is worth the oven baking!), and then dipped in some spicy brown mustard. These new corn dogs join the line of other gluten-free chicken products by Foster Farms including chicken breast nuggets and chicken breast strips. Want to know if these items can be found near you? Send the lovely folks over at Foster Farms an e-mail: questions@fosterfarms.com. Even though we do not have children – Bryan and I enjoyed these quite a bit!
Foster Farms wants to share with you! Read below on how to enter for your chance to win 1 of 5 coupons for a FREE box of their new Gluten-Free Honey Crunch Corn Dogs. While these are both gluten-free and dairy free they do however contain soy and egg.
How to Enter:
1. Like Foster Farms on Facebook – leave a comment below saying you did and your Facebook name
2. Tweet about the giveaway using #FFGlutenFree and @Creatively_GF – leave a comment below with the link
3. Like Creative Cooking Gluten Free on Facebook – leave a comment below saying you did and your Facebook name
4. Follow Creatively_GF on Twitter – leave a comment below saying you did so and your Twitter name
Giveaway is open to US residents only. Each winner will receive a coupon (sent directly from Foster Farms) for ONE FREE box of their new Gluten-Free Honey Crunch Corn Dogs. Giveaway begins on Monday December 29th and will end on Sunday January 4th at 11:59pm. Please leave a separate comment for each entry to ensure the maximum number of entries per person. The winners will be chosen via Random.org and will have 24 hours to respond, if no response(s) is received another winner(s) will be chosen. Good luck to all who enter!
This is a sponsored post – all opinions and photos are my own. Thank you Foster Farms!

Over the years, I have worked with Udi’s to promote many of their products and even though the sponsor many of the posts I do for them, I do truly buy their products! They offer such a wide range of products for families including bread items, oatmeal, cookies, tortillas, frozen entrees, and more. This year Udi’s wants to celebrate with not only myself and other bloggers but you as well! Their #EatDrinkBeMerry promotion is a HUGE giveaway with incredible prizes! Look at what I received for being part of this event and helping spread the word:

Our freezer is full of these awesome products! Bryan and I were torn on what to try first because many of these items were new to us. So We each heated up one of the non-breakfast burritos and then split them. Yummm. Such good flavor and spice in these. We were both impressed. Next up was the baguette – I brought these up to my dad’s house for an early Christmas celebration and made homemade meatballs subs on them (with some delicious Cabot Cheese) – just heat them up in the oven while still frozen and they held up great with the meatballs and sauce (not something you get very often with gluten-free products).


I picked up a grapefruit sized carnival squash yesterday while at Trader Joe’s. I’ve never cooked or even had a carnival squash before but, it is a winter squash and similar shape and size to acorn squash so I figured it would be similar in texture and taste as well…and it is. I’m already crazy Thanksgiving food and knew I wanted to bake and stuff this little carnival squash (it was about the size of a very large grapefruit) so I picked up some ground turkey, dried cranberries, and a big bag of kale to go with ingredients I already had back at the Annex.
This is a really simple recipe that can be adapted to whatever your diet restriction might be – dairy free, gluten-free, nut-free, vegetarian, low sodium, etc. It is very customizable, you just have to be creative in your stuffing fillings. My stuffing was pretty simple, but so delicious. There was no added salt to this either (except what small amount is in the spice blend I used). The flavors are that of Thanksgiving and perfect to make with leftovers, or if you are just craving a little bit of Thanksgiving throughout the year.

Ingredients
Method of Preparation

